
DIY Squad: Outdoor Bar with built in cooler
This summer the main project we tackled was our deck and getting it all set up. We set up a dining area and a seating area along with a little picnic table set up for our boys. We still had a good amount of open space on the deck and I knew just I wanted for to use it for! A bar set up! I loved the idea of having an area where guests could help themselves to drinks and when my husband told me he could add a cooler into it I was in heaven.
Here is how you can tackle it yourself.
Supplies:
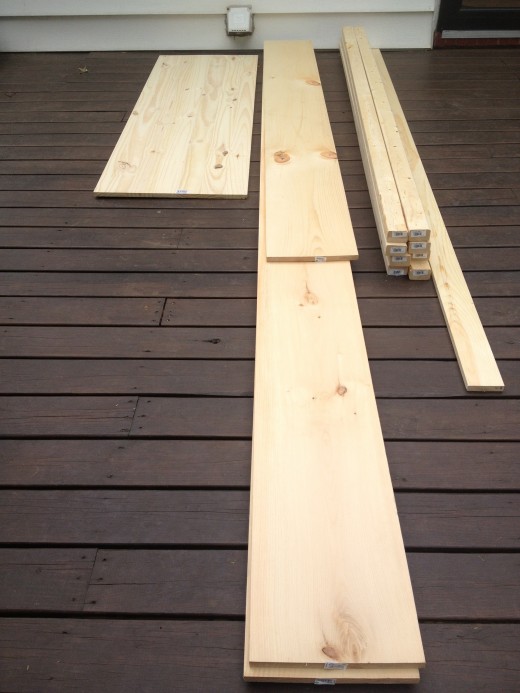
-Qty 7: 2″x 3″x 8’douglas fir
-Qty 1: 1″x 4″x 10’common pine board
-Qty 2: 1″x 12″x 12’common pine board
-Qty 4: 1″x 12″x 8’common pine board
-Qty 1: 72″ x 25″ x 3/4″ pressure treated plywood
-Qty 1: 48 quart cooler
-Qty 1: Quart of outdoor wood stain
STEP 1:
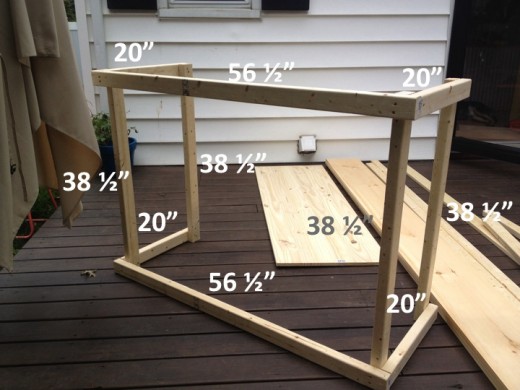
Take two 8 foot sections of 2″x3″‘s and cut them down to 56 1/2″ and from the remaining wood cut two 38 1/2″ sections.
Take another two 8 foot sections of 2″ x 3″‘s and cut two more 38 1/2″ sections and from the remaining wood cut four 20″ sections.
Screw sections of wood at 90 degree angles per photo below:
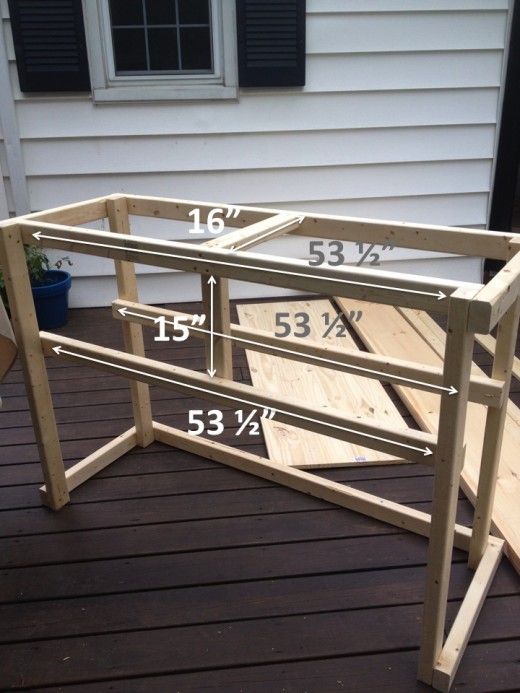
STEP 2: Turn the frame around so that you are now working “behind the bar”. From the remaining wood left in step 1 cut a 15″ section and a 16″ section. Use three more of the 2″ x 3″ 8 foot sections and cut them all down to 53 1/2″.
Take one 53 1/2″ section and mount it in front of the rear 38 1/2″ vertical sections from Step 1. 14″ down from the top of the 53 1/2″ section you just screwed into place affix another 53 1/2″ section to the front of the same 38 1/2″ vertical sections. Repeat this step to affix the remaining 53 1/2″ section to the front 38 1/2″ vertical sections from Step 1.
27 1/4″ from the left side of the frame, mount the 16″ section of 2″ x 3″ in between the front and the back top cross bars.
The remaining 15″ section needs to be mounted directly below the 16″ section therefore vertically connecting the upper 53 1/2″ cross bar to the lower 53 1/2″ cross bar.
STEP 3: Take the two 1″x 12″x 12’common pine boards and one of the 1″x 12″x 8’common pine boards and cut them into 9 sections of 39 1/4″.
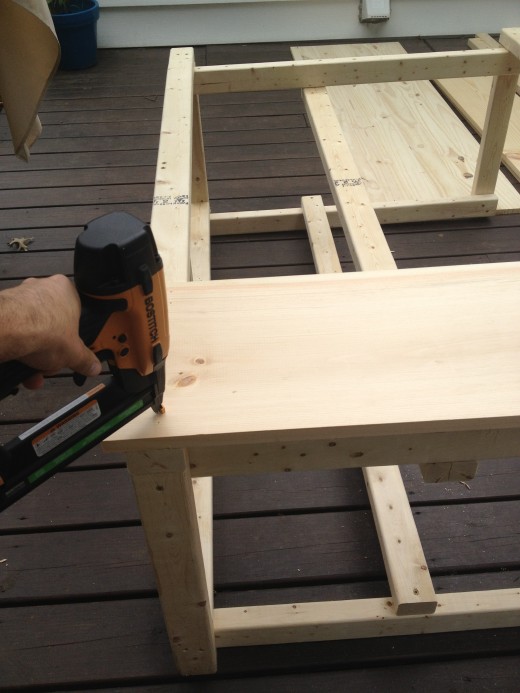
Lay the frame down on it’s back and wrap your frame with the 9 sections. You should have 5 going across the front and 2 on each side.
Make sure that the bottom of these panels is flush. The top should over hang 3/4″.
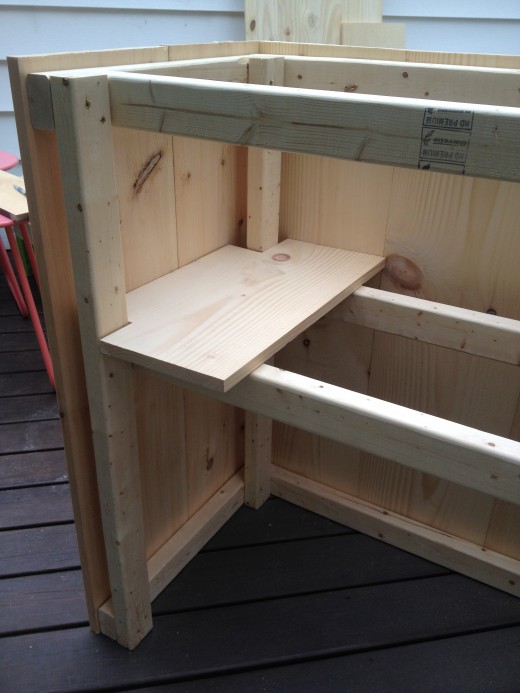
STEP 4: Use the remaining 1″ x 12″ wood to cut into 21 1/2″ sections for shelf.
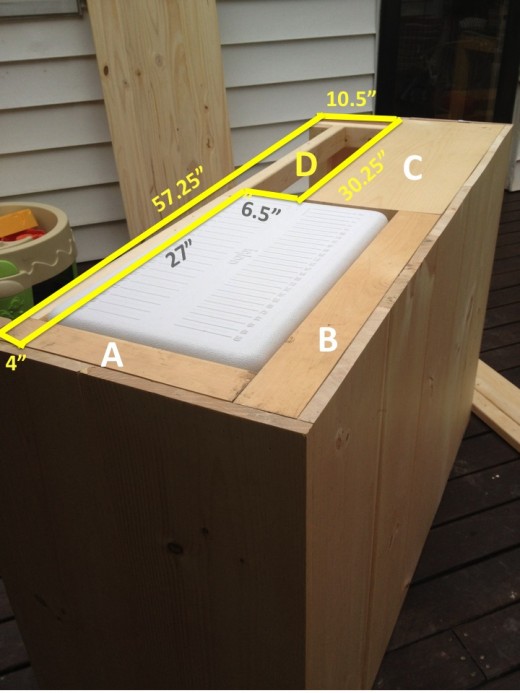
STEP 5: Building framework around cooler door. You will need to cut out 4 sections of wood from a piece of 1″ x 12″ with the following dimensions:
A: 14 1/2″ x 2 1/2″
B: 26 1/2″ x 3″
C: 30 1/4″ x 11 1/4″
D: See photo below for measurements
STEP 6: Building the bar top and finishing trim
Because you will have a cooler on one side of the bar that can be accessed from the top of the bar you will have one side of the top on hinges that opens up to the cooler and the other side will be a solid section.
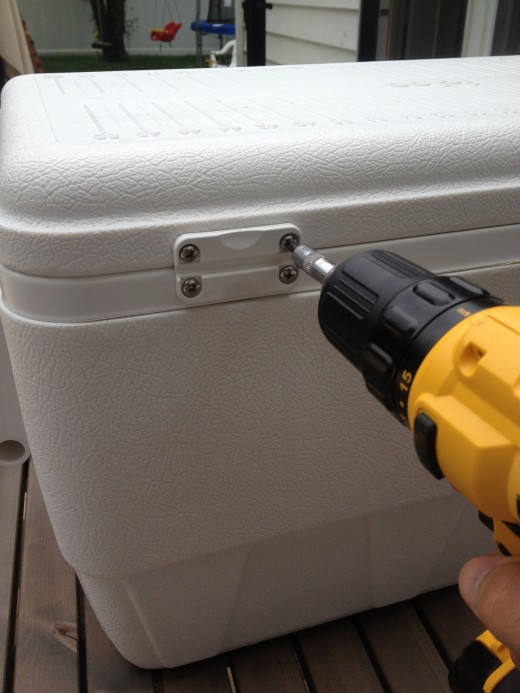
Make sure you unscrew cooler top so that it be screwed in place to the underside of your finished bar top.
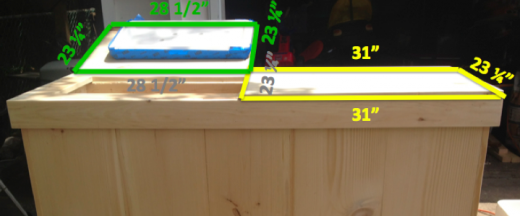
Below are your measurements for cutting. You will be using your 72″ x 25″ x 3/4″ pressure treated plywood here.
For the trim you will use 1″ x 4″ x 10′ and cut two pieces 22 1/2″ long (for the sides) and a 59 1/2″ piece (for the front).
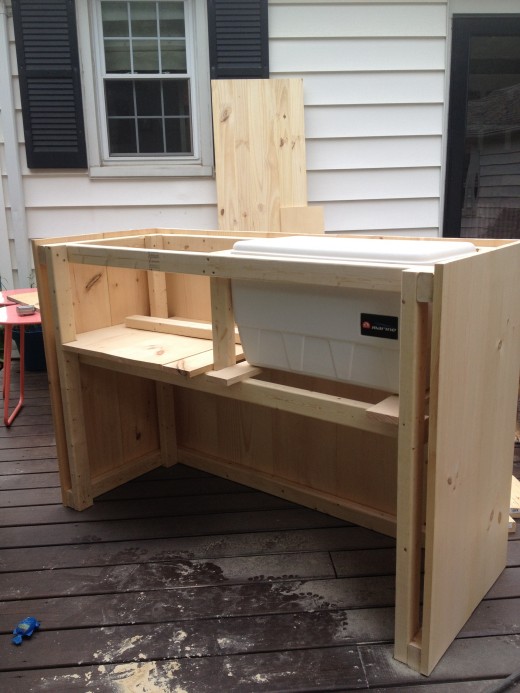
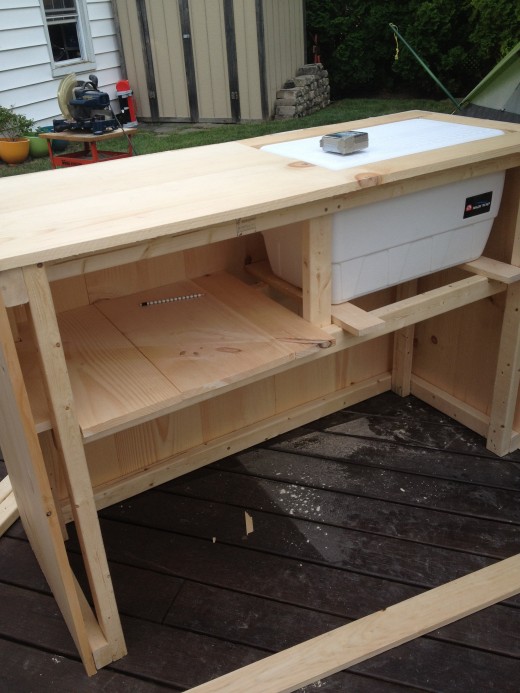
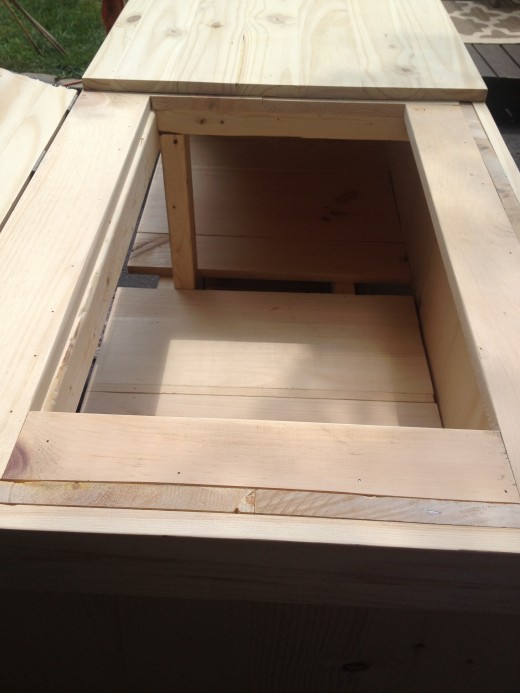
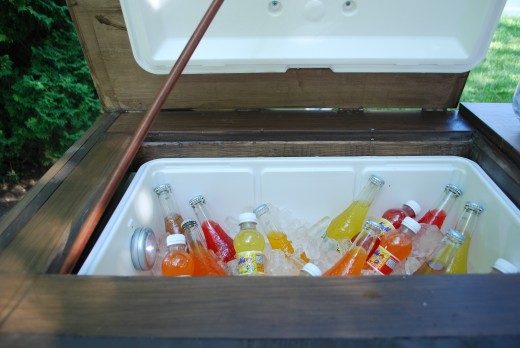
Your cooler will slide in thru the top of this opening:
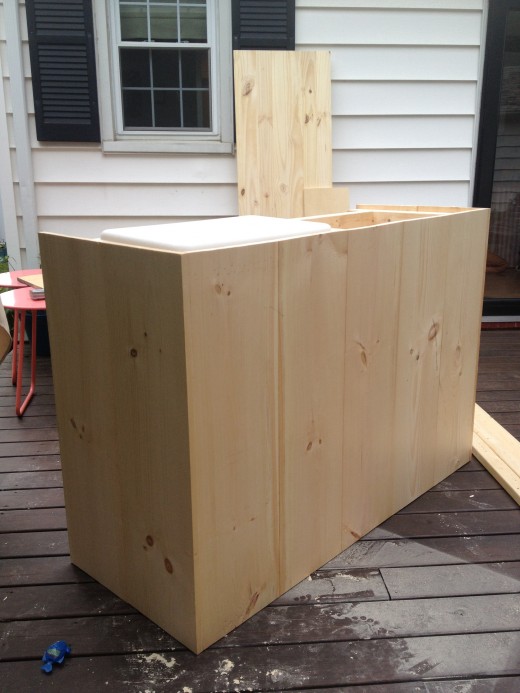
STEP 7: Staining the bar. If stain isn’t your thing you can always just paint your bar. We decided to use some left over outdoor deck stain on the bar. It worked perfectly and was easily applied with a paint sprayer and paint brush for the tiny nooks.
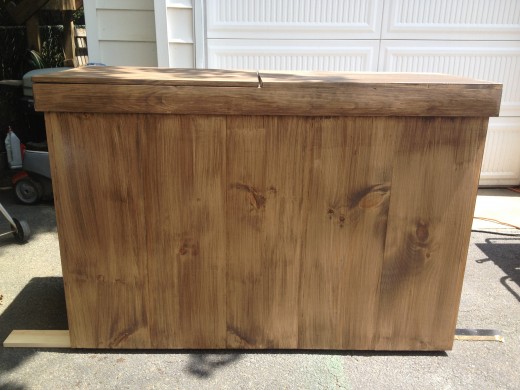
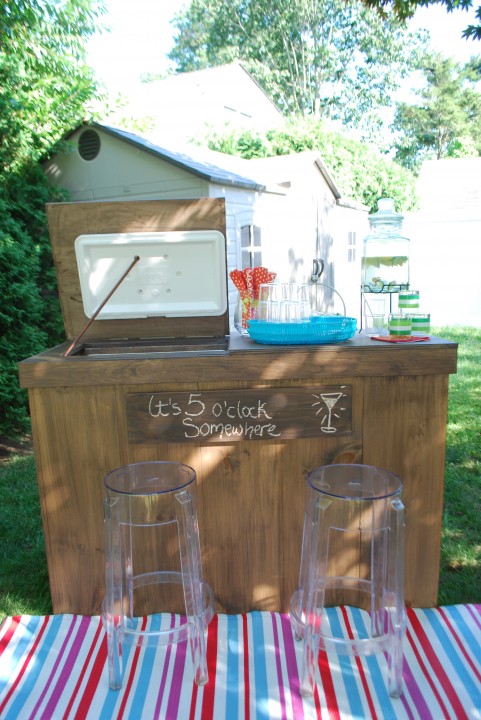
FRONT:
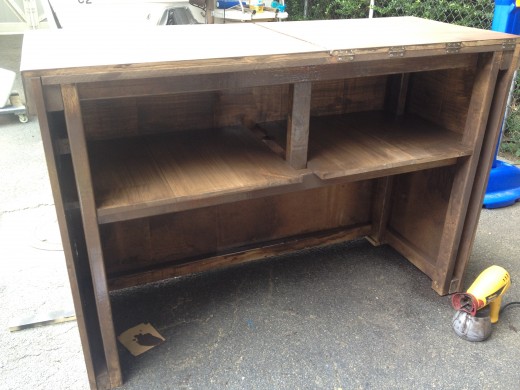
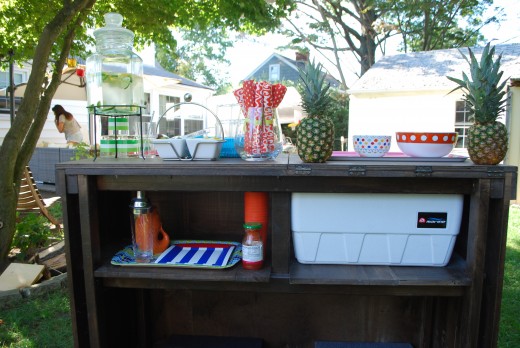
BACK:
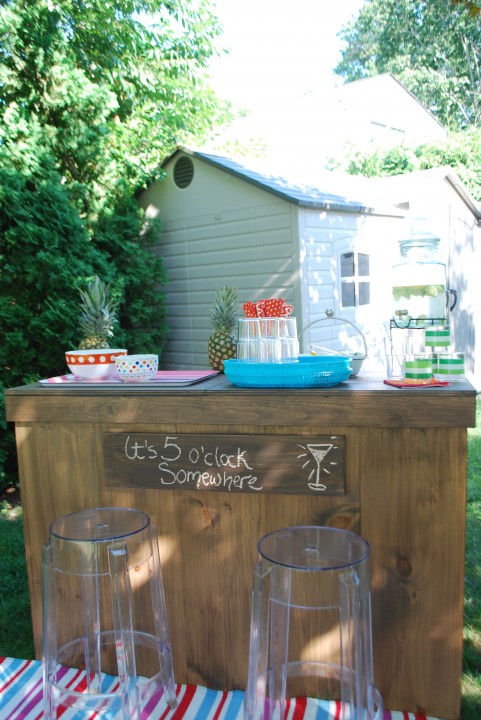
STEP 8: Invite guests over and enjoy your new bar!
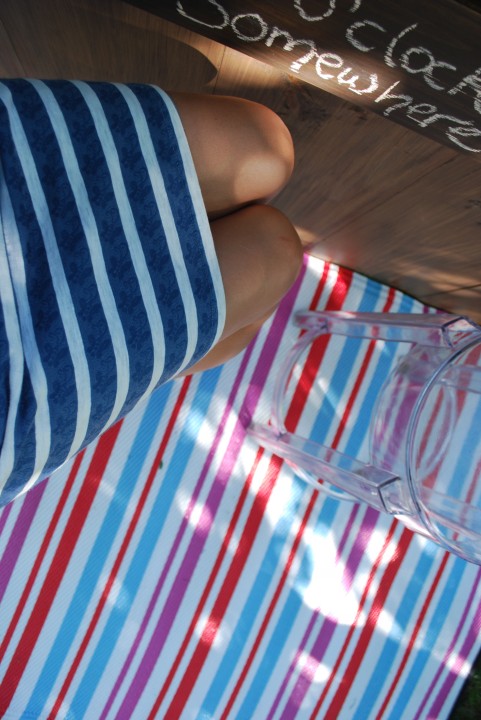 It’s 5 o’clock somewhere, right?
I was one of the bloggers selected by True Value to work on the DIY Squad. I have been compensated for my time commitment to the program as well as writing about my experience. I have also been compensated for the materials needed for my DIY project. However, my opinions are entirely my own and I have not been paid to publish positive comments.
Related
DIY Round OttomanIn "DIY"
DIY: Colette Upholstered Bed!In "DIY"
Design Dish: Sofa Pillow StylingIn "Design Dish"
Leave a Reply Cancel reply
get inspired with our own home tour
ON THE BLOG
My living room is one of the rooms that evolved drastically from when we first moved one. Originally I painted the walls chocolate brown and did accents of white, blue and orange. That lasted maybe 2 years.
Our dining room sat empty for months. Okay maybe it was empty for just a handful of weeks and then we couldn’t take it anymore and put in a folding table and plastic outdoor chairs, but in my mind that was still empty.
On the main floor of our house we have a Florida room. Being that it’s a Florida room it is a considered a 3 season room, because there is no heat in the room. The previous owners used it as an indoor patio with outdoor furniture and it looked like this when we moved in.
In our new home, the basement was completely unfinished. It was literally one of those dark spaces that you see in horror movies and are terrified of getting locked into. However, with the square footage in this house, I knew I needed to make the basement another workable and liveable floor of the house instead […]
What to look for when it comes to picking out kitchen appliances: Leave room in your budget for appliances. When it comes to kitchen renovations everyone knows that the cabinetry and the labor of demoing and installing cabinetry is going to eat a lot of your budget. However, the second most expensive part of a […]
I don’t think I’m alone in thinking that designing a kitchen is an overwhelming undertaking. I’m an interior designer and even I find it stressful to iron out all of those details. So, when it comes time to design a kitchen I always like to partner with a kitchen designer to make sure I’m remembering […]



No way! That’s awesome! Both the bar and the true value gig!
Featured today on Ana-White.com, great project, love the built-in cooler!
This is really cute!! 😀
We are planning on trying this! What length and # of screws and what type of hinges were used in this project?
Let me ask Jon and get back to you. Stay tuned.
When cleaning up and need to empty the cooler, does it easily slide out the back of the bar or do you have to pull it up from the top? Unless you release the side and let it drain as is? Confusing question but curious!
Looks great though!!
We pull it up from the top, but you can also just release the drain, which is what we typically do.
We are planning on trying this! What length and # of screws and what type of hinges were used in this project?
What brand of cooler is this? I am planning on making this for a birthday gift and want to just buy the same cooler you guys used!
Hi,
I’m in the process of building this as we speak; problem is your measurements are wrong in step two.
You right,
Take one 53 1/2″ section and mount it in front of the rear 38 1/2″ vertical sections from Step 1. 14″ down from the top of the 53 1/2″ section you just screwed into place affix another 53 1/2″ section to the front of the same 38 1/2″ vertical sections.
If you come down 14” from the top to secure the second 2×3 there is no way you’re going to have 15” between the two boards in the back of the bar as your picture shows.
Let me ask my husband and get back to you. We made it a while ago.
Thanks but I finished it the other day, just had to redo a couple of measurements. Also you might want to correct this.
(STEP 3: Take the two 1″x 12″x 12’common pine boards and one of the 1″x 12″x 8’common pine boards and cut them into 9 sections of 39 1/4″.)
39 1/4′ x 3 = 117 3/4″ with 26 1/4″ left on the 12′ board.
391/4″x 2 =78 1/2″ with 17 1/2 ” left on the 8′ board. that’s a total of 8 pieces.
It should say use three 1″ x 12″ x 12′ to get the 9 pieces required.
Wanting to make this tomorrow. Are all the changes to the measurements reflected in the new plans?
I’m looking at starting this project in the next couple weeks and wanted to check what you did as a correction to the measurements. I’m very new to building so don’t want to get started and confused if the measurements are a bit off.
Let me have my husband go over them again. I will updated any changes.
This looks awesome and just what we’ve been looking for! We are metric in this country, do you have metric measurements?
I’m so sorry I’m in the US and didn’t do it in metric measurements.
What size screws and hinges?
This is a great DIY project using it to design a bar for my daughters wedding thank you for sharing
Yay! You must send me a picture!
Looking to tackle this project this week. For those that did it, could you share the size of screws you used?
I have almost finished the bar. But it doesn’t say how you secure the lid to the plywood top.