
DIY Round Ottoman
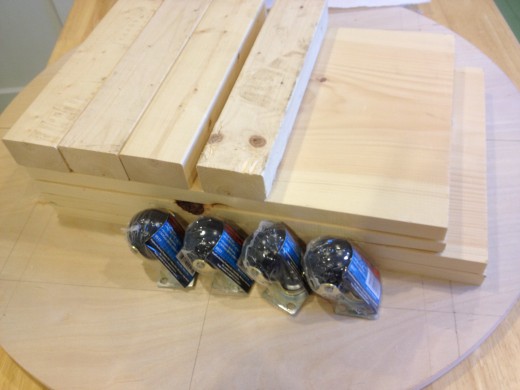
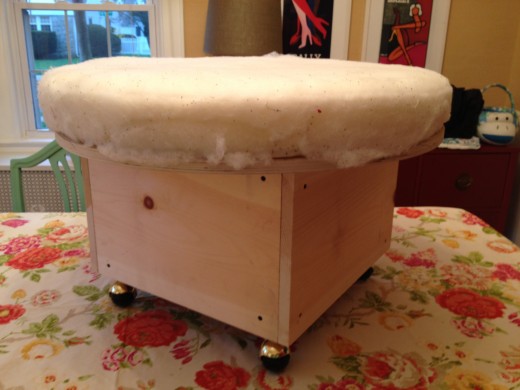
There are a number of tutorials out there on how to make your own ottoman/coffee table in a rectangular or square form. I haven’t seen many in the round variety, but that is exactly what I needed recently for a client and I’m happy to report it’s quite simple to turn this:
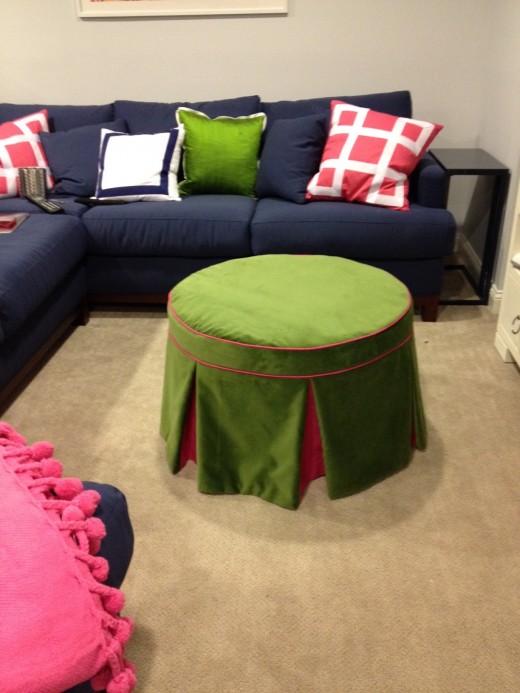
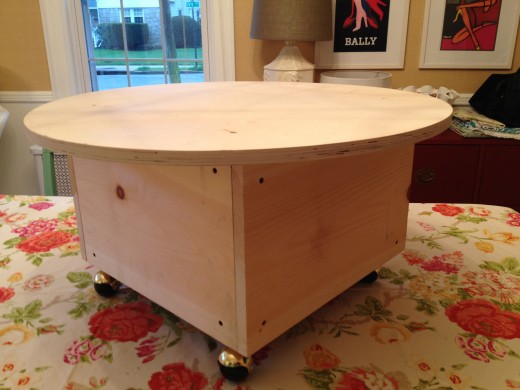
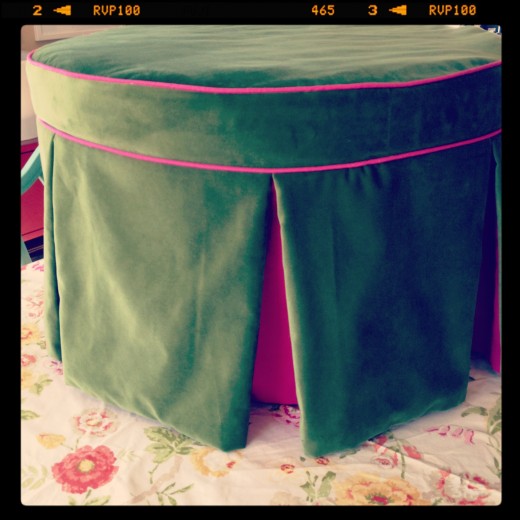
To this:
Here is what you’ll need:
-Decorator round table top. I purchased mine from Ready to Cover and went with a 28″ diameter top.
-Qty 1: 12″ wide x 1″ thick x 6ft long pine board
– 4 casters
– Qty 1: 2″ wide x 3″ thick x 4ft long
-Qty 1: 3 ft x 3 ft square of 3″ deep high density foam
– Roll of quilters batting
Instructions:
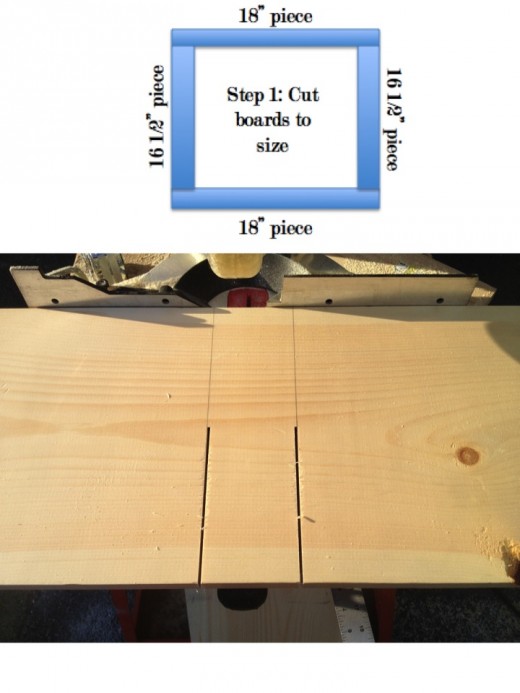
Step 1: Since you are making a square frame for your decorator table top to rest on top of you must make sure that two pieces are 16 1/2″ and two pieces are 18″ so that when they overlap you have a perfect square. Cut all pieces and lay them out first to make sure they line up properly. Do not screw anything in this step.
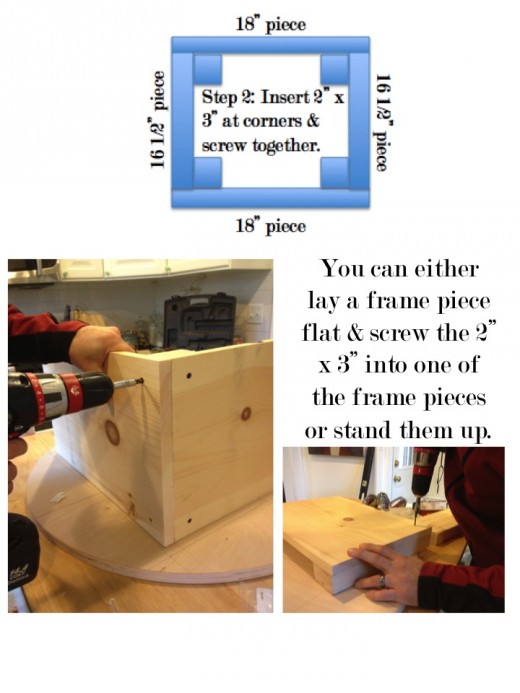
Step 2: In order to support the frame and have a sturdy base along with a place to add wheels (wheels are optional) you need to attach a 2″ x 3″ onto the edges of the 16 1/2″. Each edge of the 16 1/2″ sides will have a 2″ x 3″ flush mounted. You will then sandwich the 16 1/2″ sides in between the 18″ sides and screw together.
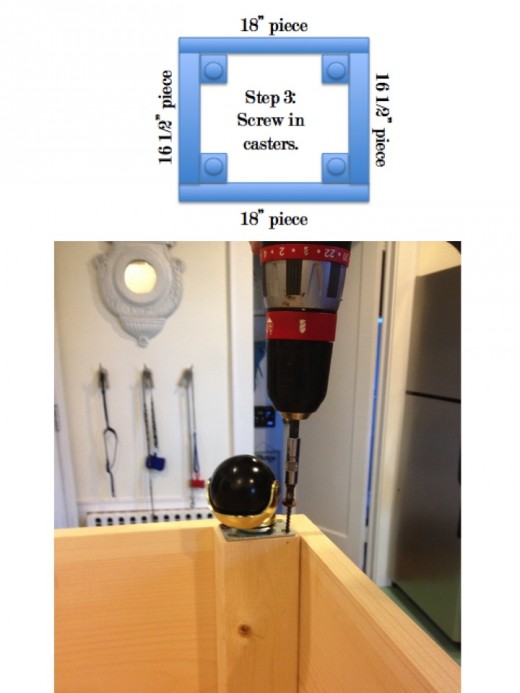
Step 3: If you do not want your ottoman to have wheels then skip this step. Please note that it will be lower than the average coffee table height if you do this. To remedy this add a thicker foam for the top or get a wider piece of wood for your frame. In order to make this step easier we marked the screw holes first and pre-drilled holes into the wood to prevent it from splitting.
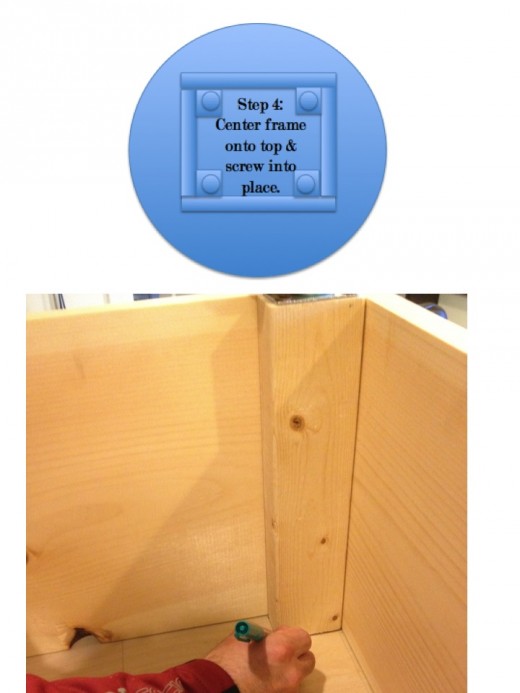
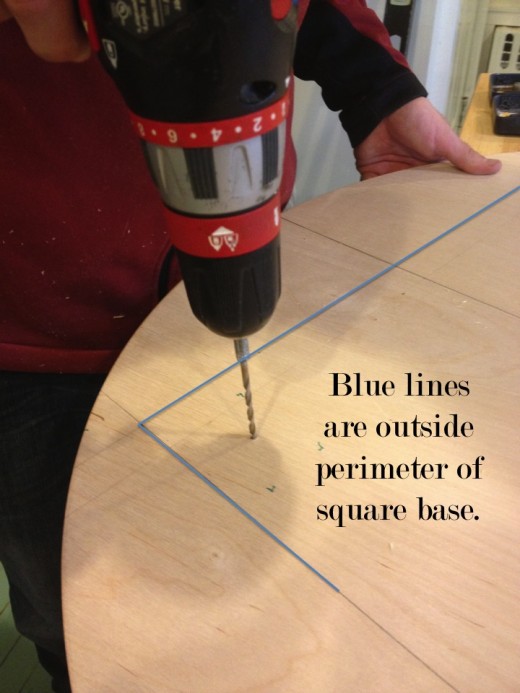
Step 4: Place decorator top on the bottom and then center your square base on top of it aka casters up. In order to screw it together mark the edges of the 2″ x 3″ on the decorator table top as seen in picture below.
Note the blue lines in the image below. When you are marking the 2″ x 3″ corners you should also draw a perimeter around the outside of the square base (this will be used to realign the table top on the base once flipped right side up)
Now you can remove the square base and drill holes on the decorator top in the 2″ x 3″ markings that you just made.
Place the base on the ground with the casters on the floor, place the decorator top over the base and make sure it falls within the blue lines that were drawn around the outside perimiter (this will ensure your 2×3’s are under the holes you just drilled).
Screw the decorator top to the base using the holes you just drilled.
Step 5: Add foam base to table top and top with batting. I like to use high density foam when I’m doing ottomans that work double duty as coffee tables as well. We went with 3″ foam in order to have a finished product that fit the standard coffee table height of 18″-20″. I add the batting to the top in order to give it a more rounded finish. You can attach the foam and batting with spray adhesive or leave it as is. It will all stay together once the slipcover is attached.
Step 6: Finished! I’m not a seamstress so when it comes to slipcovers I always reach out to my workroom. If you don’t have a workroom, but you still want help I’ve always had luck with the gigs section in craigslist. I will place a gig for services I need and ask for quotes on making a slipcover along with portfolio pictures of their work and voila instant workroom.
I love little details so I added a pink accent in the piping and then decided I wanted a little bit of a peek a boo pink in the pleating as well.
So, who’s ready to tackle this on their own? The building of the piece from start of cutting the wood pieces to adding the layer of foam came in at around 1 and half hours. Not bad at all!
* All of our measurements are based on having a 28″ diameter round coffee table with wheels and 18″ in height.
Skill Level: Beginners Time: 1 and half – 2 hours
Related
Leave a Reply Cancel reply
get inspired with our own home tour
ON THE BLOG
My living room is one of the rooms that evolved drastically from when we first moved one. Originally I painted the walls chocolate brown and did accents of white, blue and orange. That lasted maybe 2 years.
Our dining room sat empty for months. Okay maybe it was empty for just a handful of weeks and then we couldn’t take it anymore and put in a folding table and plastic outdoor chairs, but in my mind that was still empty.
On the main floor of our house we have a Florida room. Being that it’s a Florida room it is a considered a 3 season room, because there is no heat in the room. The previous owners used it as an indoor patio with outdoor furniture and it looked like this when we moved in.
In our new home, the basement was completely unfinished. It was literally one of those dark spaces that you see in horror movies and are terrified of getting locked into. However, with the square footage in this house, I knew I needed to make the basement another workable and liveable floor of the house instead […]
What to look for when it comes to picking out kitchen appliances: Leave room in your budget for appliances. When it comes to kitchen renovations everyone knows that the cabinetry and the labor of demoing and installing cabinetry is going to eat a lot of your budget. However, the second most expensive part of a […]
I don’t think I’m alone in thinking that designing a kitchen is an overwhelming undertaking. I’m an interior designer and even I find it stressful to iron out all of those details. So, when it comes time to design a kitchen I always like to partner with a kitchen designer to make sure I’m remembering […]


you make it look so easy! LOVE that. may have to give our living room a little update! not to mention, that green velvet. so good!
xx,
kristin
omgeetheblog.com
What a great tutorial! And I love the slipcover. Amazeballs!!
Awesomeness, Camila!
LOVING the peek of pink between the pleats!
Thanks for being so generous with your tutorial – I may have to sic my husband on it!
Wow that looks incredible! What a great DIY! I wonder if I can convince my husband to make one of these, he isn’t NOT handy but it doesn’t look too hard.
Crazy impressive! The pink piping and pleats look amazing!
Oh and got my Payless shoes, they’re even comfy! I’m channeling Coco as I wear them!
Love the color combo and the versatility of the rolling ottoman. Great job.
GREAT tutorial, so clear cut, looks doable and great end result! The DIY in the title drew me to your blog! great job.
Nancy
Powellbrowerhome.com
What a lovely finished product! I am lacking in the DIY part of my brain and projects like this really make me wish I weren’t. Gorgeous!
ahhh I love this! I want one of my own!! Actually I want that pink and green one,love it!
Wow this looks amazing and what a great color combo with the navy sofa!
I want to make one! The hot pink piping you chose is perfect.
Very nice! I am Pinning this on my board I’ve called “Really, Really Good Tutorials.” Thanks so much.
Wow! it turned out perfect. And great idea about asking for quotes on Craigslist!
you are way more talented than i. i love this. it looks like a $200 piece you would buy at a fabulous store. great job!
Great tutorial! I just wanted to mention, if you create a square lip on the underside of round top that fits just inside the square base, then instead of screwing the top down it could lift off when you slip the upholstery off for sneaky storage!!
I love it! That pop of pink is very sexy
I love that it’s round! Thanks so much for sharing this, I’ll be linking to your fantastic tutorial!
Oh I LOVE the finished result! Great job!!
Looks great! I really like the idea of adding casters to make the ottoman easier to maneuver. In fact, little more than a week ago, I did just that in our living room with our oversized storage ottoman. I found some cool rollerblade casters. on Amazon for about $6 each. There was enough solid framework on the bottom of the ottoman to catch 3 of the 4 holes on each mounting plate and I used sturdy bolts with large washers to help even the load out and they’re rated for 200+ lbs capacity each.
And they’re in red, which is our accent color for the room!
Living Room
Caster closeup