
DIY GREEK KEY LUCITE TRAY
So far I’ve shared with you how to create abstract collage, pom pom heart pillow, felt silhouette pillow, caned ribbon trim pillow, lucite shadow box for framing an outfit/momento and a painted ikat frame.Whew! That was quite a bit! You can only imagine how my dining room (where I tackled all of these projects) looks at the moment.
Our last DIY gift project is a great one! Lucite trays are all the rage. Everyone either has one or secretly or in my case not so secretly wants one. They can come with a bit of price tag most times so here is how to get the look for less than $20!
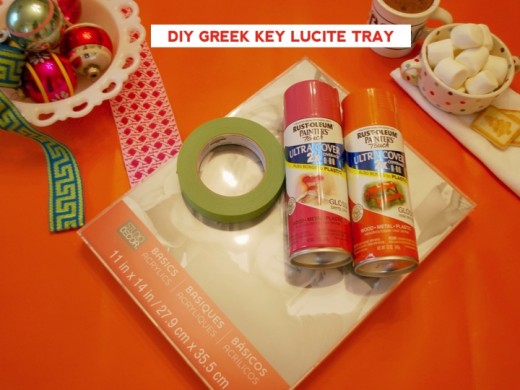
Here is what you’ll need:
Like in our lucite shadow box project you will need one of those acrylic frames. I found this 11″ x 14″ version at Michaels for $7.99 (It’s in the frame section and it’s a rather assortment with all sorts of sizes). You’ll also need painters tape, 2 different color spraypaints and wipe on poly.
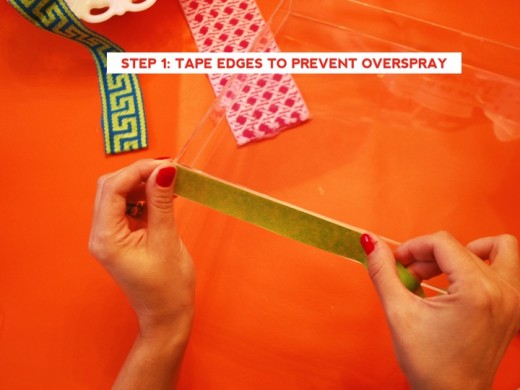
Step 1: Now in order to protect the look/vibe of a lucite tray I wanted the sides of the tray to remain clear. In order to do simply add some painters tape. Now if you want you can totally paint the sides it’s up to you.
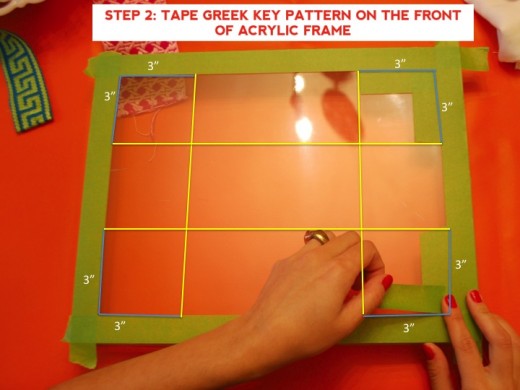
Step 2: You can do a bunch of different greek key type patterns, but we decided to go simple so we wouldn’t go nutty with the tape. Like in the lucite shadowbox frame we are going to paint on the back of the acrylic. In this case the face of the frame or what will be the bottom of the tray is where we will be painting so that is where will need to do our taping.
SIMPLE STEPS FOR TAPING PATTERN:
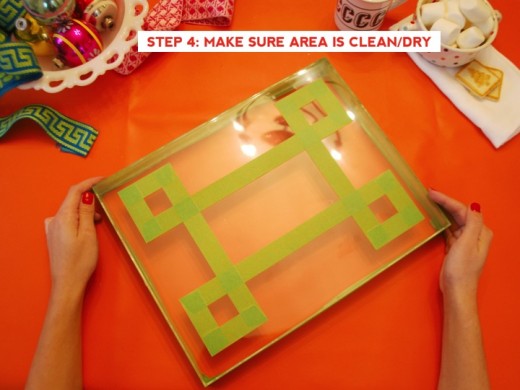
-In order to get the above pattern we made a perimeter of tape around the border of the tray.
-For an 11″ x 14″ tray cut 8 3″ pieces of tape. These 3″ sections will be your 4 corners aka the blue guidelines above.
-To finish up the greek key pattern just connect the corners vertically and horizontally aka the yellow guidelines above. No need to pre-cut pieces here.
* In order to make it easier to remove the tape once we were done we cut our pieces of tape on a angle so that it was easier to pick up a corner and remove.
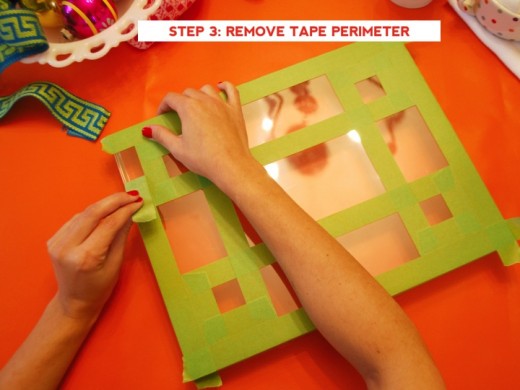
Step 3: Once your pattern is set in tape you can remove the perimeter of tape and you start to your greek key pattern emerge.
Step 4: Make sure your painting area is clean and then make sure it is fully dry before spray painting.
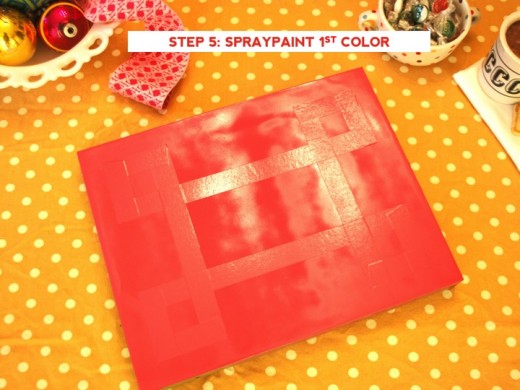
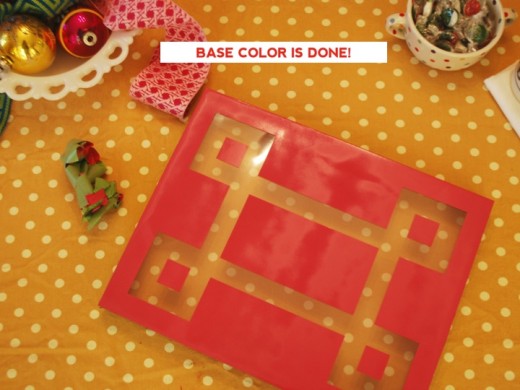
Step 5: Spray paint 1st color (we used pink as our base) and let fully dry.
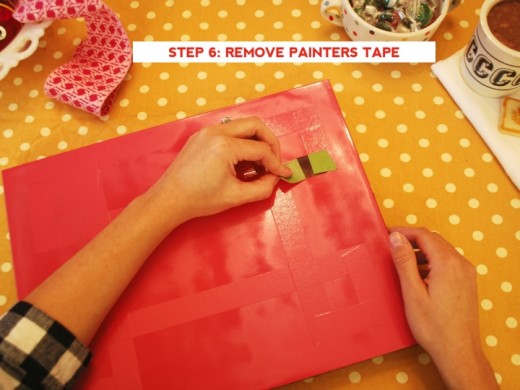
Step 6: Remove painters tape.
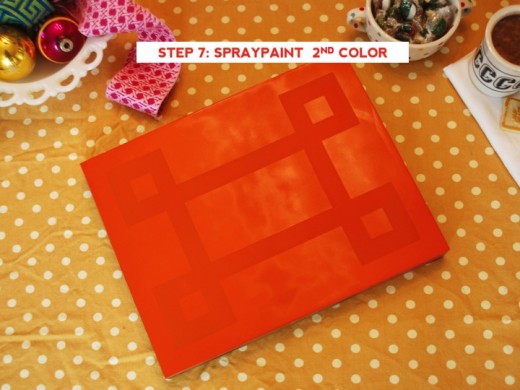
Step 7: Now it’s time to add your 2nd color ( aka the color your pattern will be). We went with orange.
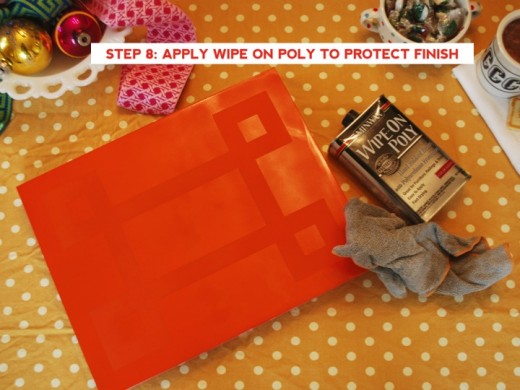
Step 8: Let 2nd color fully dry and then add wipe on poly to protect the finish.
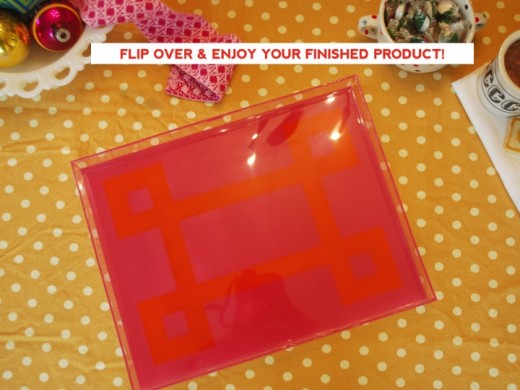
All done!
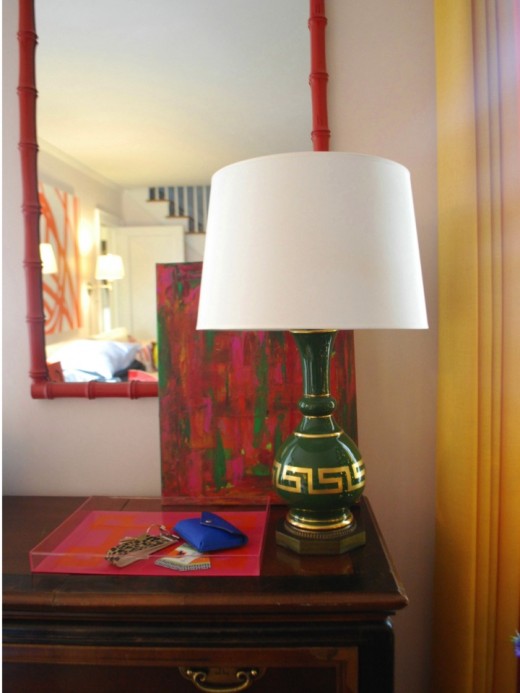
Now go around yourself and find the perfect place for it and then pick up more supplies to actually make a version for a gift.
Ah so perfect if I do say so myself. Plus since all of the painting is on the underneath of the tray you can toss whatever you like on it and you will get no scratching!
Do you have a favorite DIY gift project?
Related
Leave a Reply Cancel reply
get inspired with our own home tour
ON THE BLOG
My living room is one of the rooms that evolved drastically from when we first moved one. Originally I painted the walls chocolate brown and did accents of white, blue and orange. That lasted maybe 2 years.
Our dining room sat empty for months. Okay maybe it was empty for just a handful of weeks and then we couldn’t take it anymore and put in a folding table and plastic outdoor chairs, but in my mind that was still empty.
On the main floor of our house we have a Florida room. Being that it’s a Florida room it is a considered a 3 season room, because there is no heat in the room. The previous owners used it as an indoor patio with outdoor furniture and it looked like this when we moved in.
In our new home, the basement was completely unfinished. It was literally one of those dark spaces that you see in horror movies and are terrified of getting locked into. However, with the square footage in this house, I knew I needed to make the basement another workable and liveable floor of the house instead […]
What to look for when it comes to picking out kitchen appliances: Leave room in your budget for appliances. When it comes to kitchen renovations everyone knows that the cabinetry and the labor of demoing and installing cabinetry is going to eat a lot of your budget. However, the second most expensive part of a […]
I don’t think I’m alone in thinking that designing a kitchen is an overwhelming undertaking. I’m an interior designer and even I find it stressful to iron out all of those details. So, when it comes time to design a kitchen I always like to partner with a kitchen designer to make sure I’m remembering […]



Wow! That looks great. Very clever.
Awesome. I find these pictures frames often via thrifting but I always pass them up. After seeing this diy I’ll have to pick up a couple.
Love this project, I have to try it when the weather gets nicer and I can go outside to spraypaint!
great idea! I would have never thought to turn one of those frames into a tray, thanks for sharing!
Looks great! I’m not a DIY-type, but I might attempt this. I have an additional question: where is your leopard key fob from? I want!
What a great idea! Pinned it Thanks for sharing!
I love this idea! Can’t wait to try this out!
Too cool!! Cannot wait to try!!
Very cool, someday I might try that
I needed a hostess gift and this is perfect! You made the steps so easy to understand!
Cute tutorial. But how did you apply the second color in the taped off pattern without spray painting over the first since it looks like it wasn’t taped off.
How did you app;y the orange color??? I’m confused
Oh I get it! The pink is already down so once you spray the second color it will only show through the greek key! Very cool!