Primp & Pamper Bathroom Blog Series: Progress
This week on our Primp & Pamper Bathroom Blog Series I’m going to be sharing a bit of the progress we have had. If you want to go back to the beginning and check out the before photos and our plan than head to our 1st Primp & Pamper blog series post.
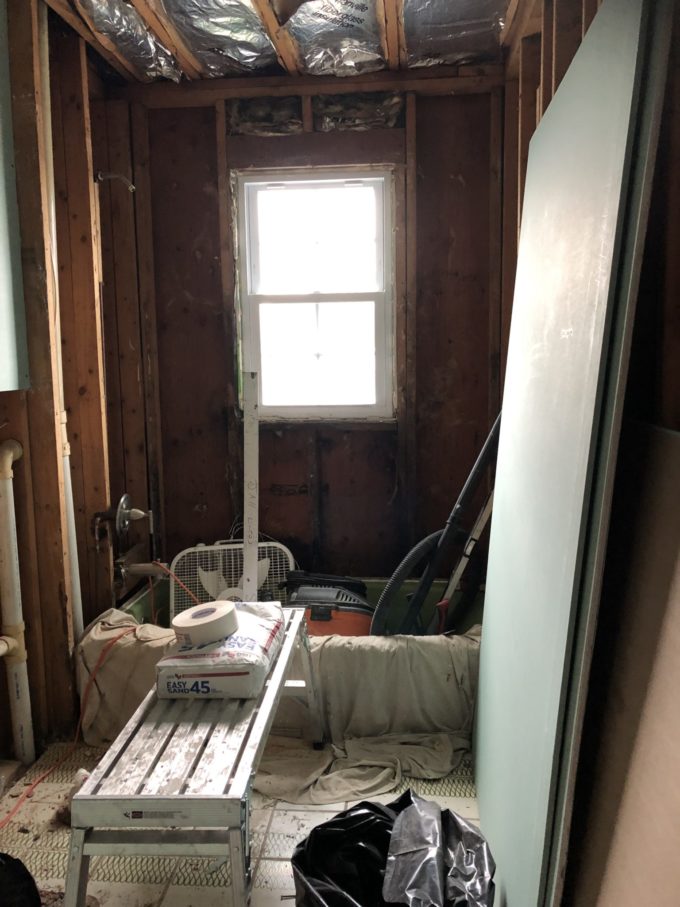
Like all projects, things always look worse before they get better so bare with for some scary pictures! With all of the tile in the bathroom, the demo overwhelmed me and while I normally DIY everything I decided to call in help for this project. My handy man, Frank, and his crew demoed the shower alcove and tile walls in one day.
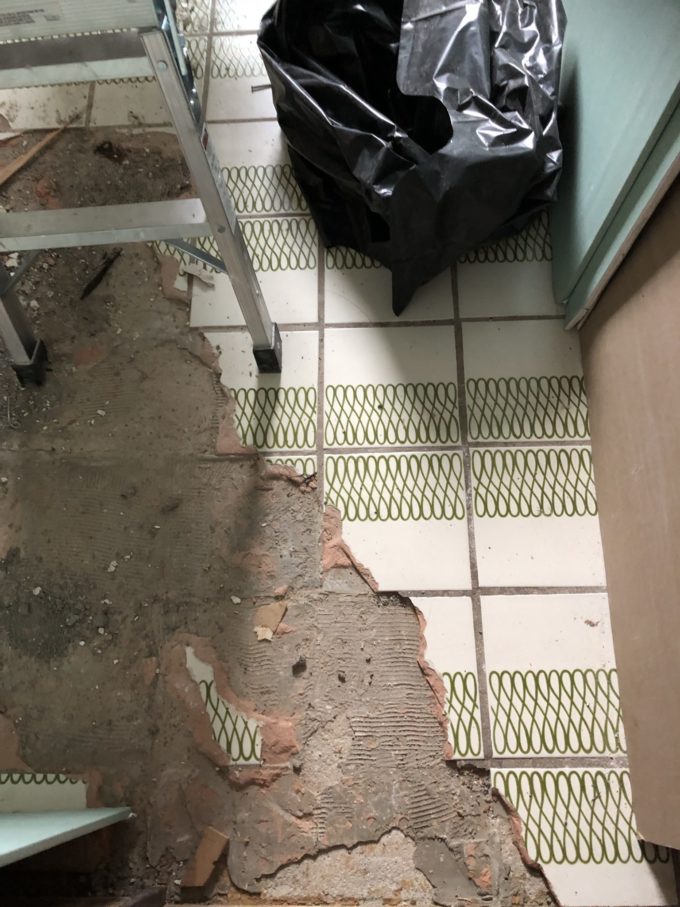
The demo on the floor started on day one as well, but it was a bit more intense and required a second day. While the floor tile was hard to remove once it was removed we noticed that the previous homeowners used a vapor barrier aka a sheet of plastic and once we removed that the subfloor was perfect and ready for new tile!
When they opened up the walls in the shower alcove we discovered that some of the beams in that wall were rotting. It was good that we caught it and could now repair it, but it did add more time to our project. Originally I was going to just re-glaze the bathtub white, but we started looking into new options and since the prices weren’t crazy we decided to just treat ourselves to a new one. So, again that added a bit more time to our project.
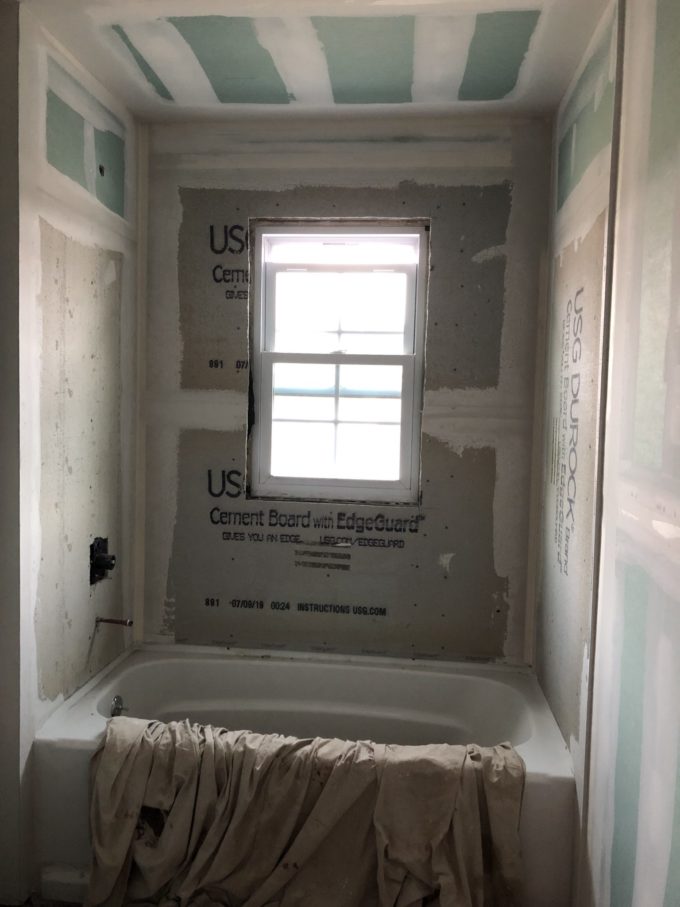
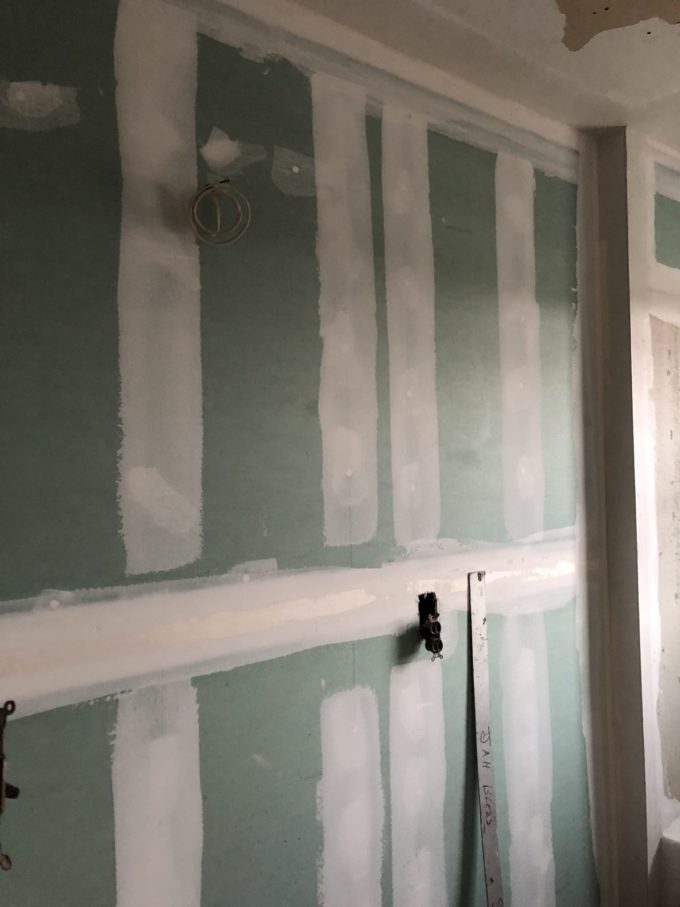
The walls took a couple of days to re-sheetrock, but we are now finally at the stage where I can primp them and get them ready for wallpaper! When the walls were exposed Jon was able to go in and work on the electrical for our beautiful vanity light from Hinkley Lighting. We have never had a vanity light in this bathroom and it has always felt really dark to me. I was so excited when Jon said it would be easy to run the electric himself and I can’t wait for the walls to be finished so, that we can hang it!
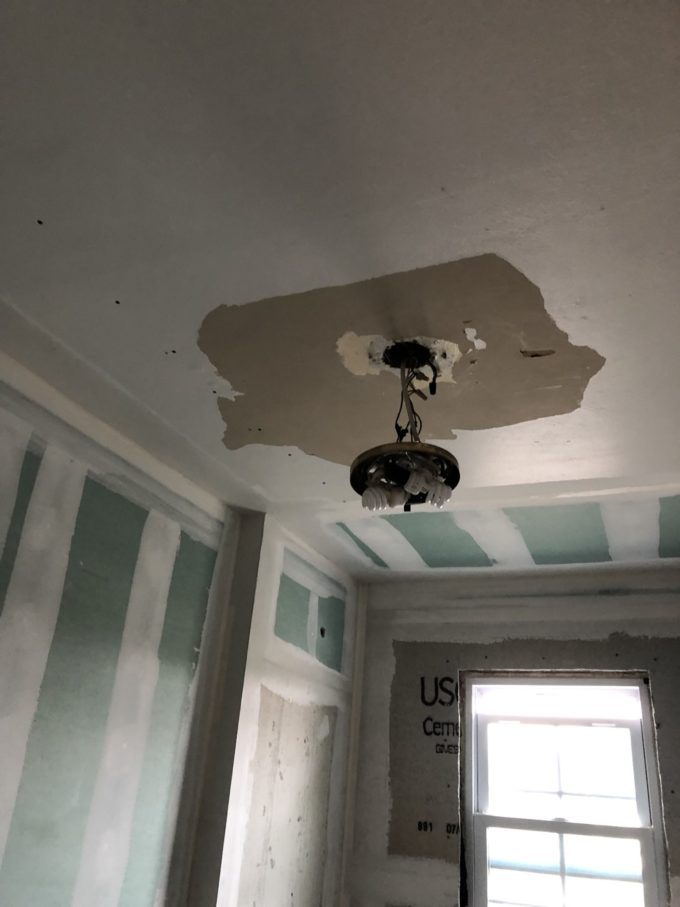
We had one other blip in the plans during our demo work and that was the ceiling! We planed on repainting it and switching out the flush mount with Build.com’s Bellevue drum flush mount in brass. It’s the perfect piece for a touch of updated traditional glam! When we were taking the old light fixture on that had been there since the beginning of time the ceiling around it started to peel away! The contractor believes it was probably because they didn’t prime it, but it was also really old so, I’m not sure the exact cause. So, now we have to deal with this peeling mess on ceiling. We could have the contractor fix it, but it adds more to the budget so, I think Jon and I will be DIYing this issue.
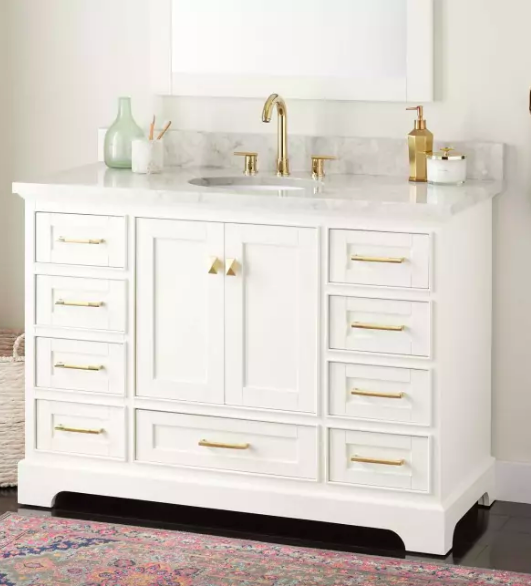
Now tiling is underway and about 90% finished and once that’s done we can get to the fun stuff! You know I love color, but I stayed pretty neutral in the piece pieces in this space like our Signature Hardware 48″ Quen Vanity
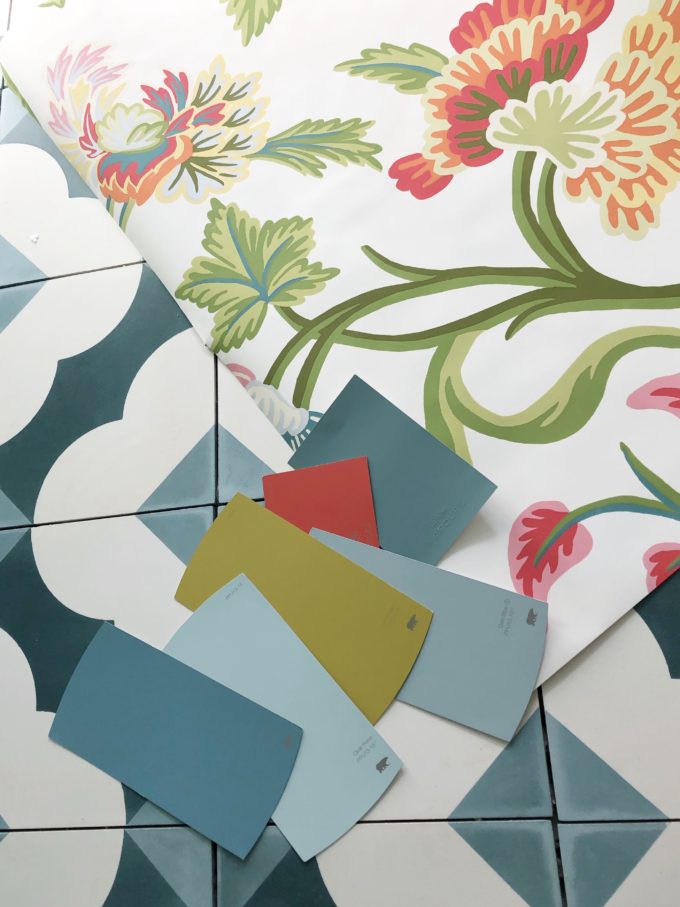
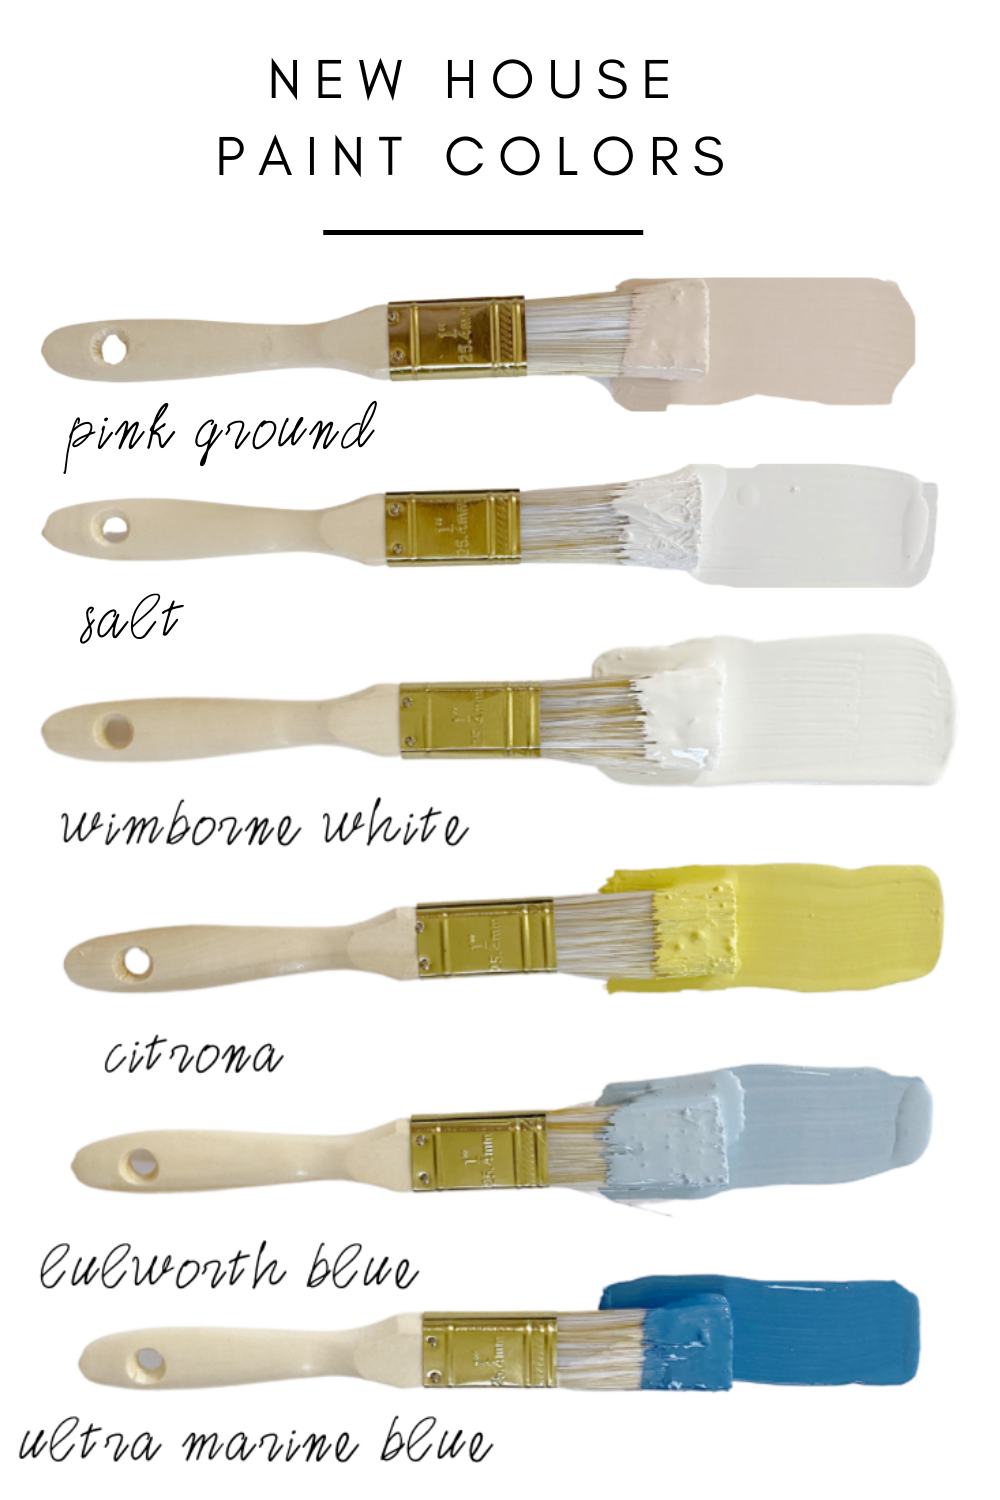
Isn’t she pretty!!! I’m obsessed with the marble countertop! Now, on the walls we are doing beadboard and then wallpaper above that. I was going to leave the beadboard white, but now this color loving lady is thinking that is a little too white and I want some color! I picked up some swatches yesterday. Does anything jump out to you? Should I paint it a color?
Ah! What is a girl to do?
Make sure you take a look at what the other ladies are doing as well! We are all going in totally different directions, but everything looks amazing!
Jeweled Interiors | PMQ for Two | House Homemade | Rain on a Tin Roof | Effortless Style Blog | Haneen’s Haven | Kaleidoscope Living
Related
Leave a Reply Cancel reply
get inspired with our own home tour
ON THE BLOG
My living room is one of the rooms that evolved drastically from when we first moved one. Originally I painted the walls chocolate brown and did accents of white, blue and orange. That lasted maybe 2 years.
Our dining room sat empty for months. Okay maybe it was empty for just a handful of weeks and then we couldn’t take it anymore and put in a folding table and plastic outdoor chairs, but in my mind that was still empty.
On the main floor of our house we have a Florida room. Being that it’s a Florida room it is a considered a 3 season room, because there is no heat in the room. The previous owners used it as an indoor patio with outdoor furniture and it looked like this when we moved in.
In our new home, the basement was completely unfinished. It was literally one of those dark spaces that you see in horror movies and are terrified of getting locked into. However, with the square footage in this house, I knew I needed to make the basement another workable and liveable floor of the house instead […]
What to look for when it comes to picking out kitchen appliances: Leave room in your budget for appliances. When it comes to kitchen renovations everyone knows that the cabinetry and the labor of demoing and installing cabinetry is going to eat a lot of your budget. However, the second most expensive part of a […]
I don’t think I’m alone in thinking that designing a kitchen is an overwhelming undertaking. I’m an interior designer and even I find it stressful to iron out all of those details. So, when it comes time to design a kitchen I always like to partner with a kitchen designer to make sure I’m remembering […]
