


DIY: Custom looking Window Treatments
Window Treatments can take a big chunk of your room budget if you decide to go custom. I have some pretty great seamstresses that I work with whose rates are very budget friendly, but add to that loads of yardage that I would have needed for my bay window and I knew I had to go the DIY route.
One of my favorite go to places for budget friendly window treatments that look luxe is JC PENNEY. The best part is that they normally have some sort of promo code going on. So when I purchased my window panels they were on sale and then an extra 20% off!
Now I wanted to add something a bit more custom to the window and give a bigger impact so I knew a padded cornice would be a good solution.
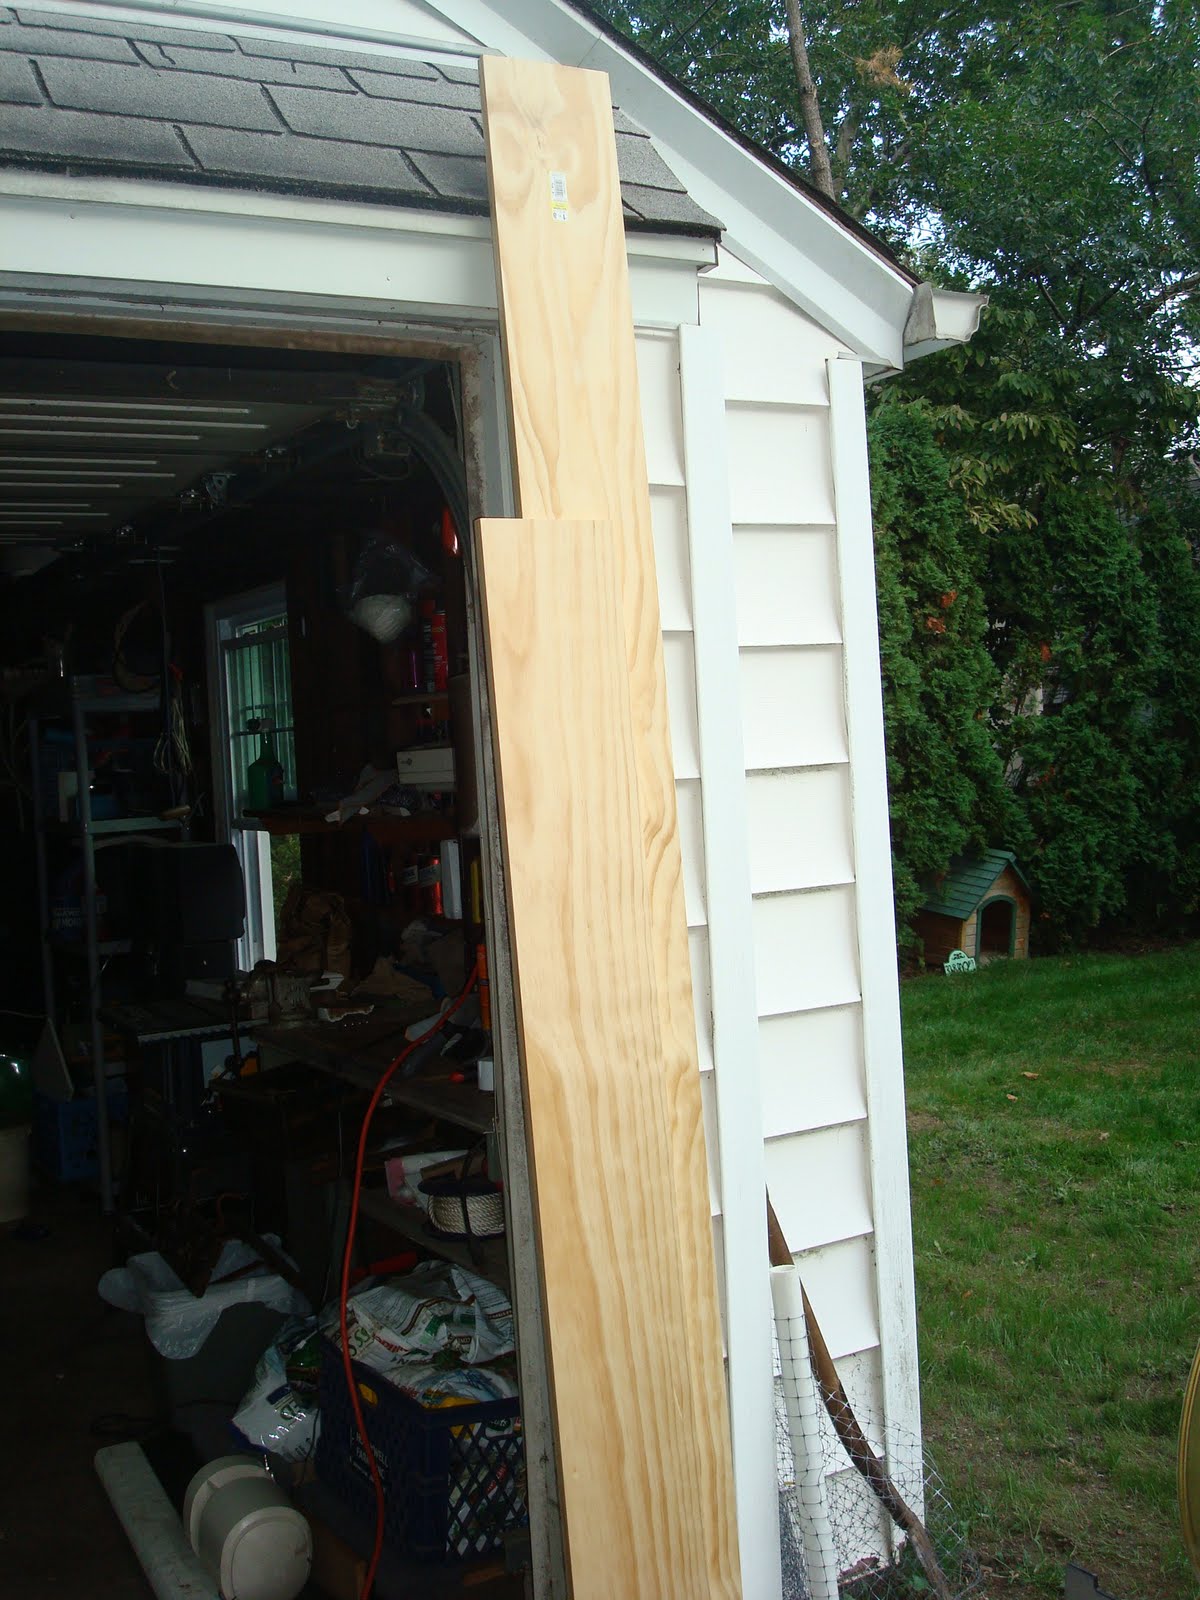
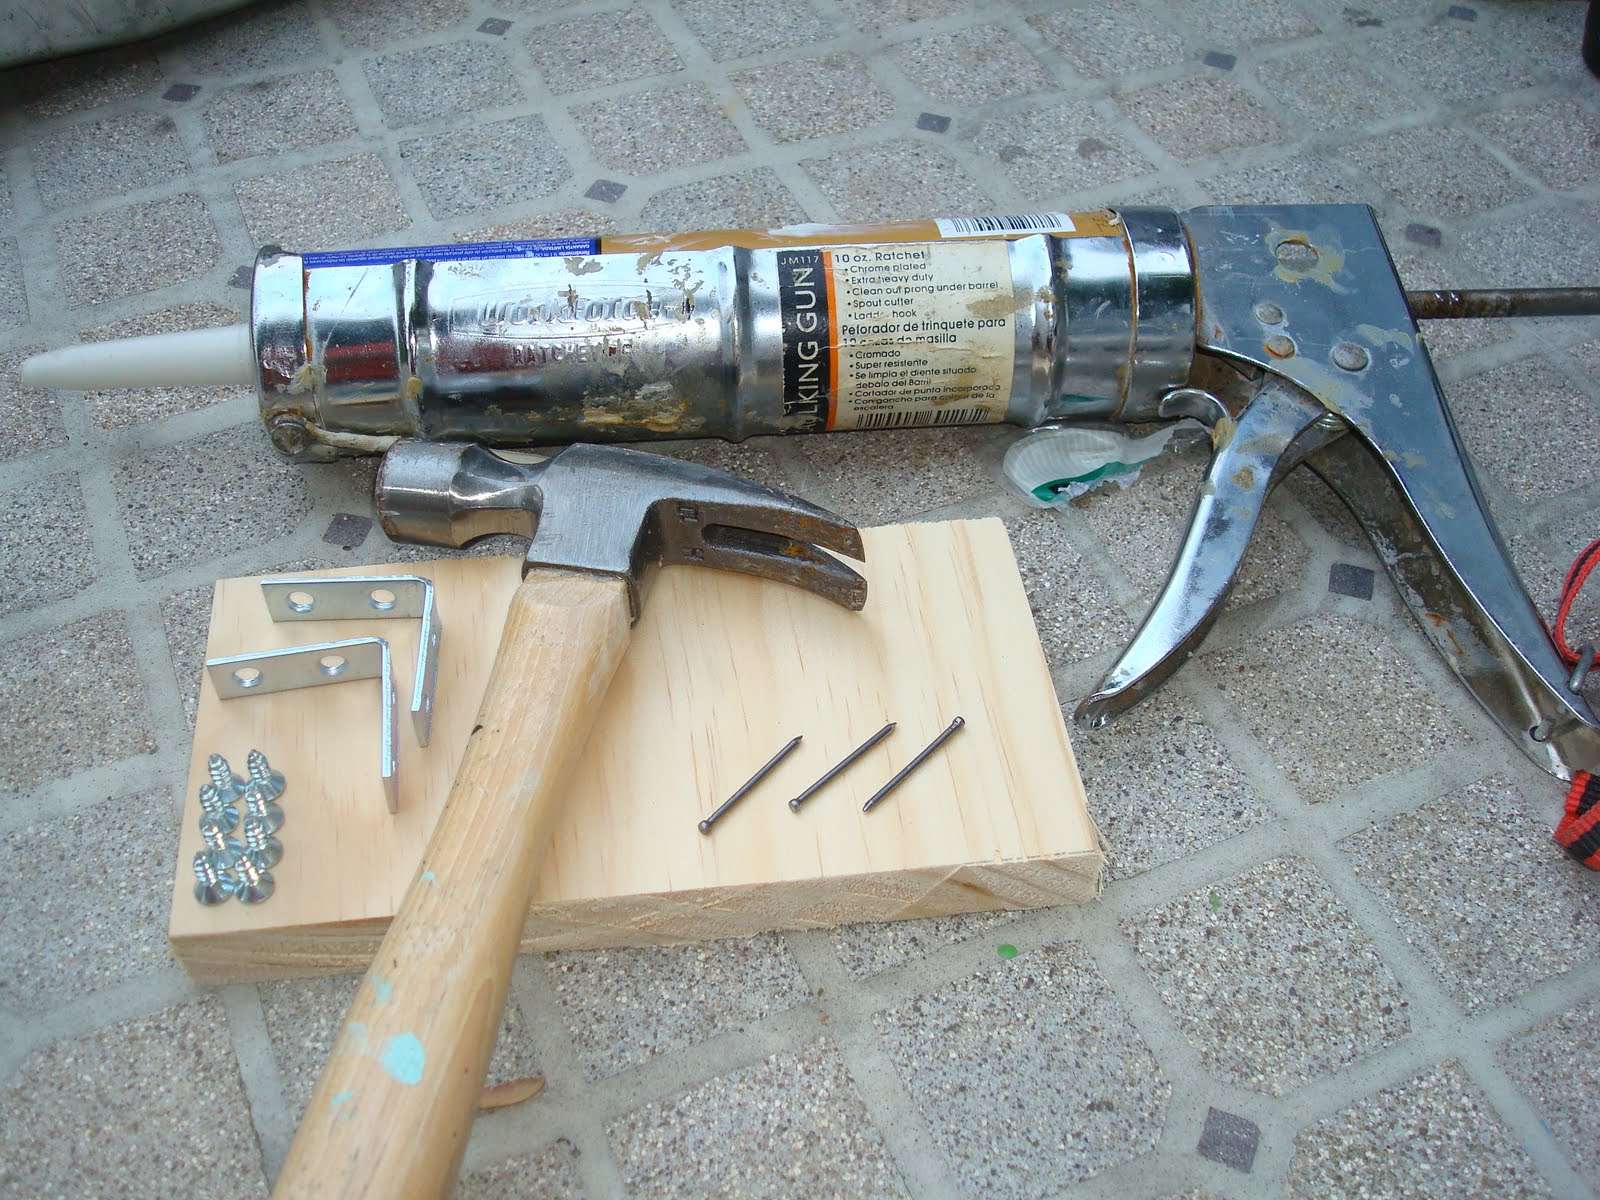
After a quick trip to Home Depot we had our supplies:
and
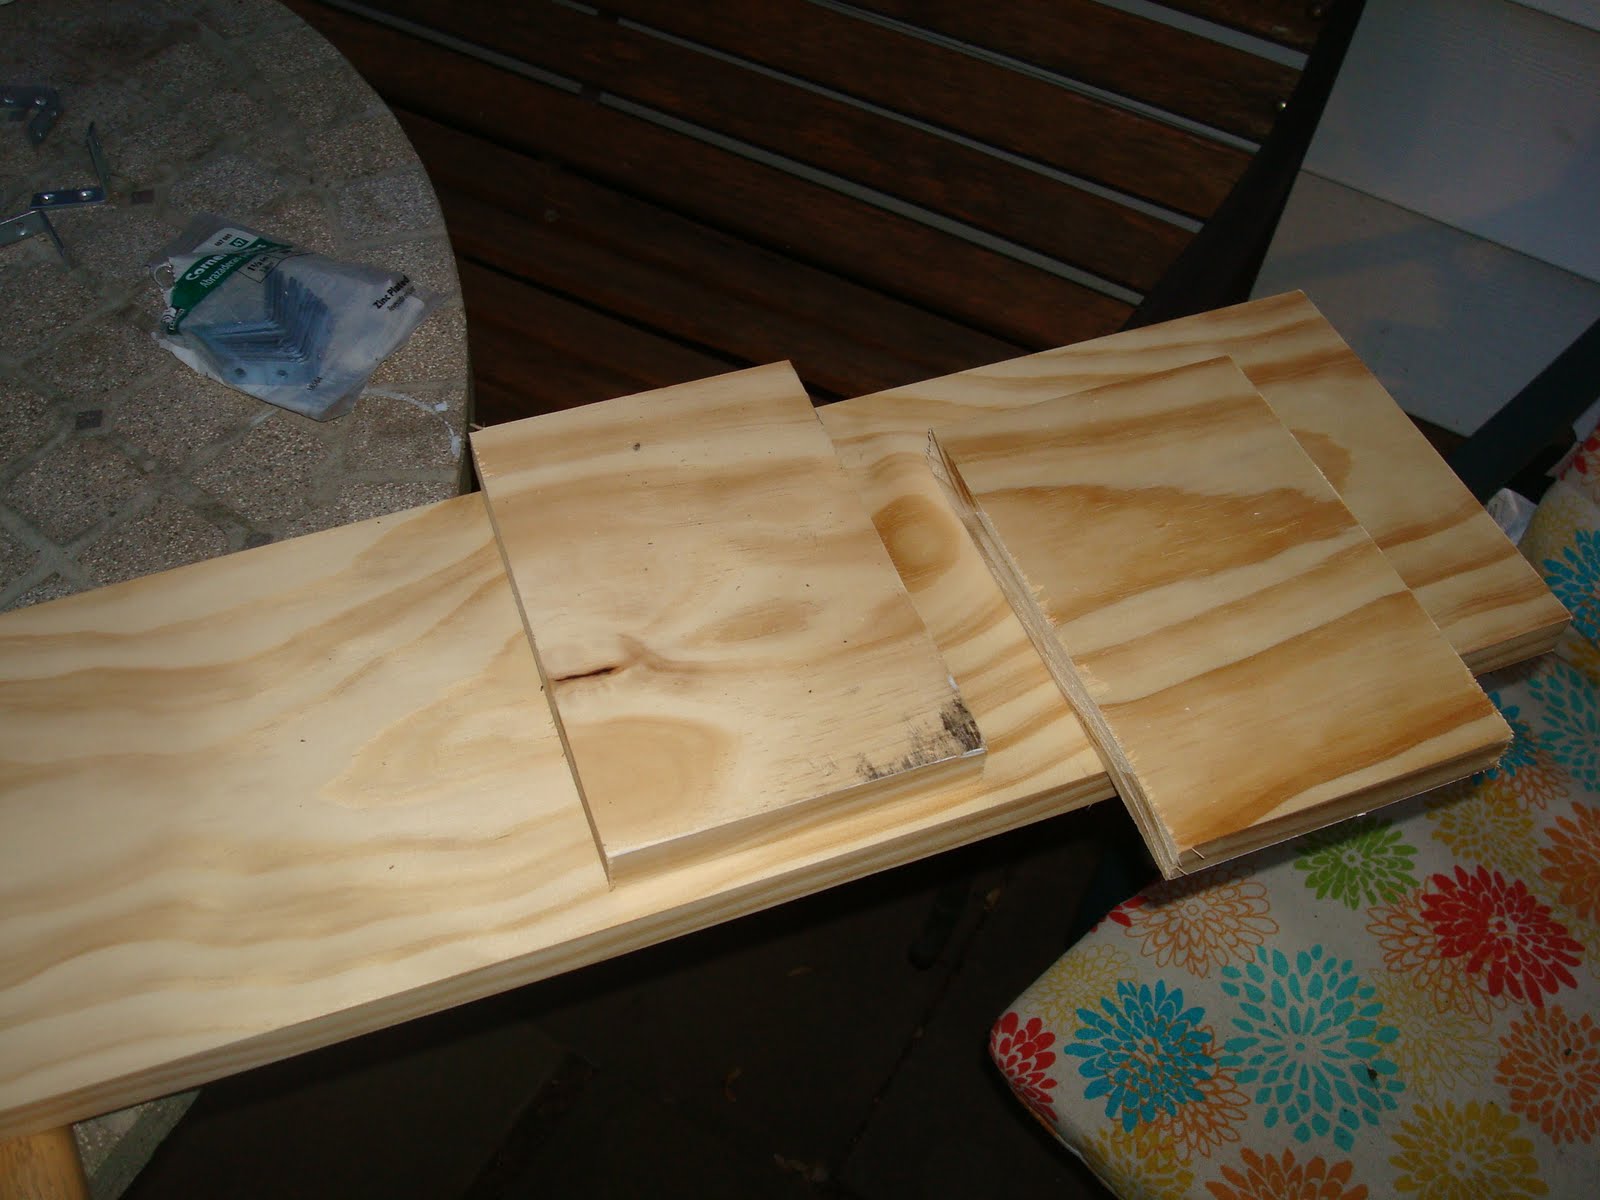
Now it will be different for everyone, but I cut down my main piece to size and then decided that I wanted my side pieces to be 4″.
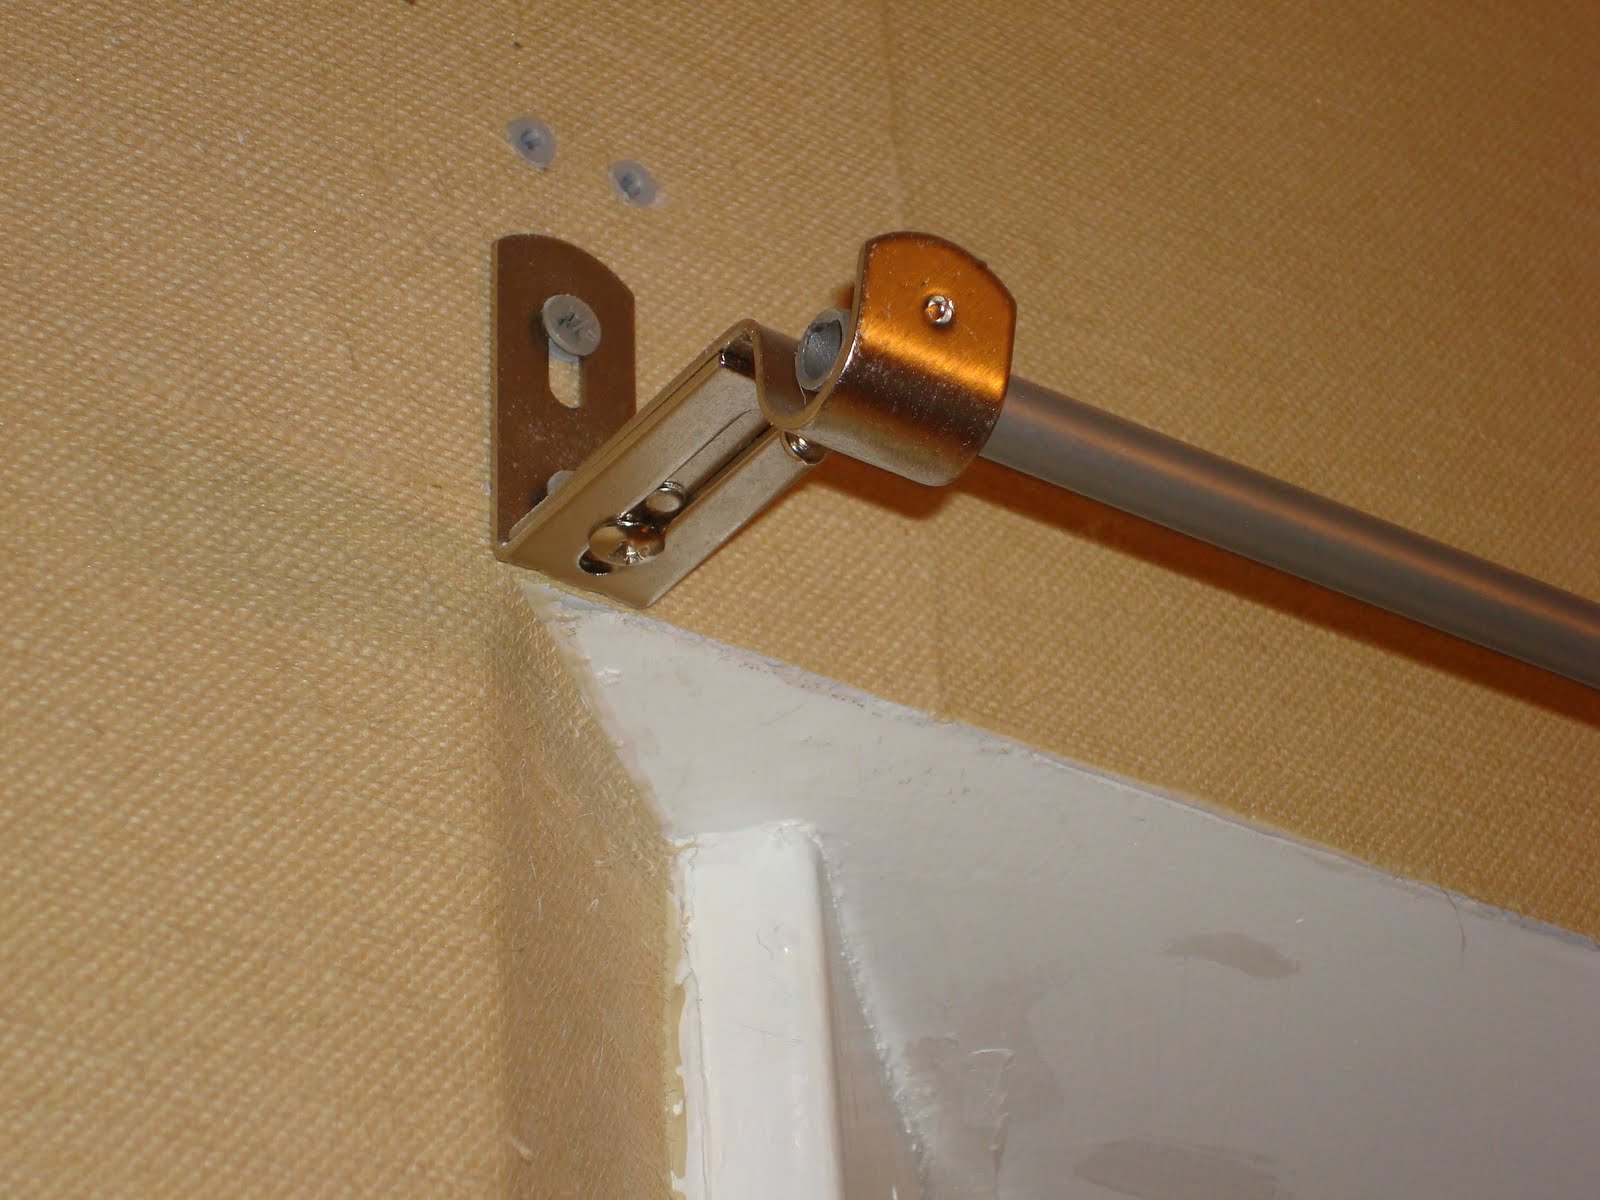
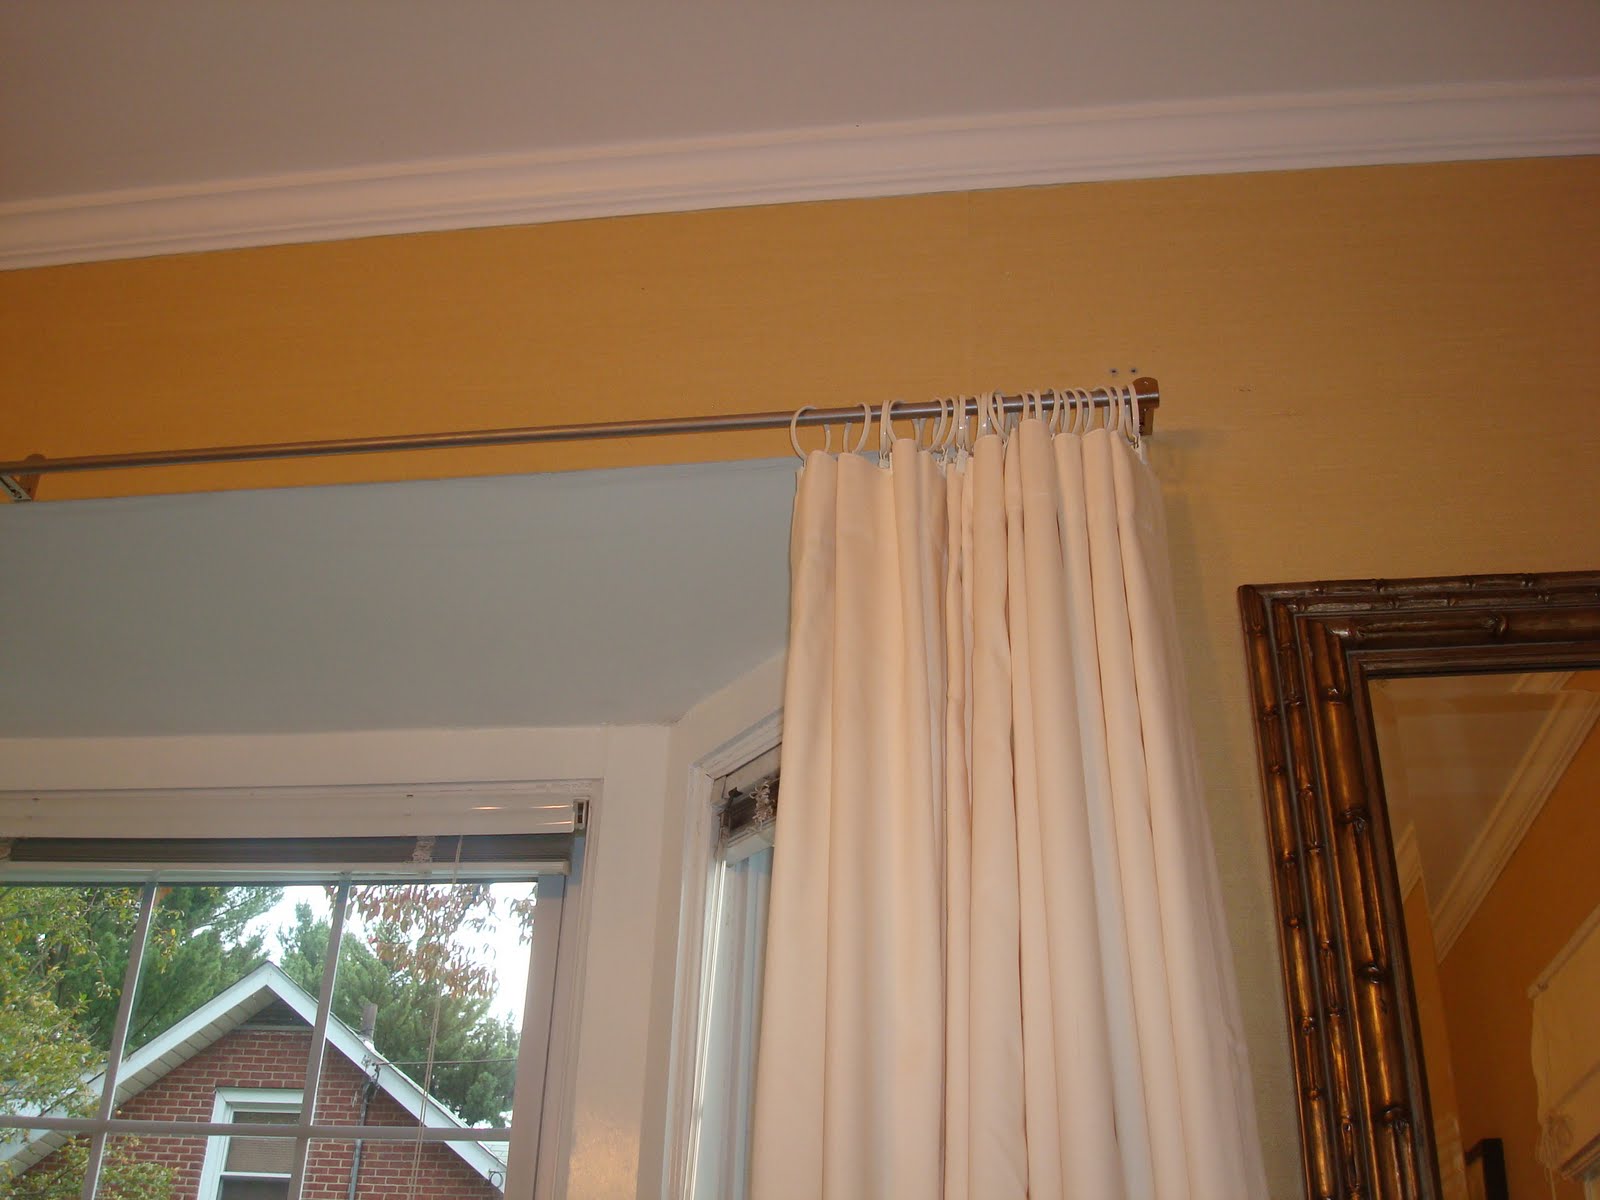
The side pieces need to be at least 3 and 1/2 inches, because of how far my curtain rod stuck off the wall. I purchased an inexpensive rod set by Umbra at Century 21 for $10!
Side profile of my curtain rod:
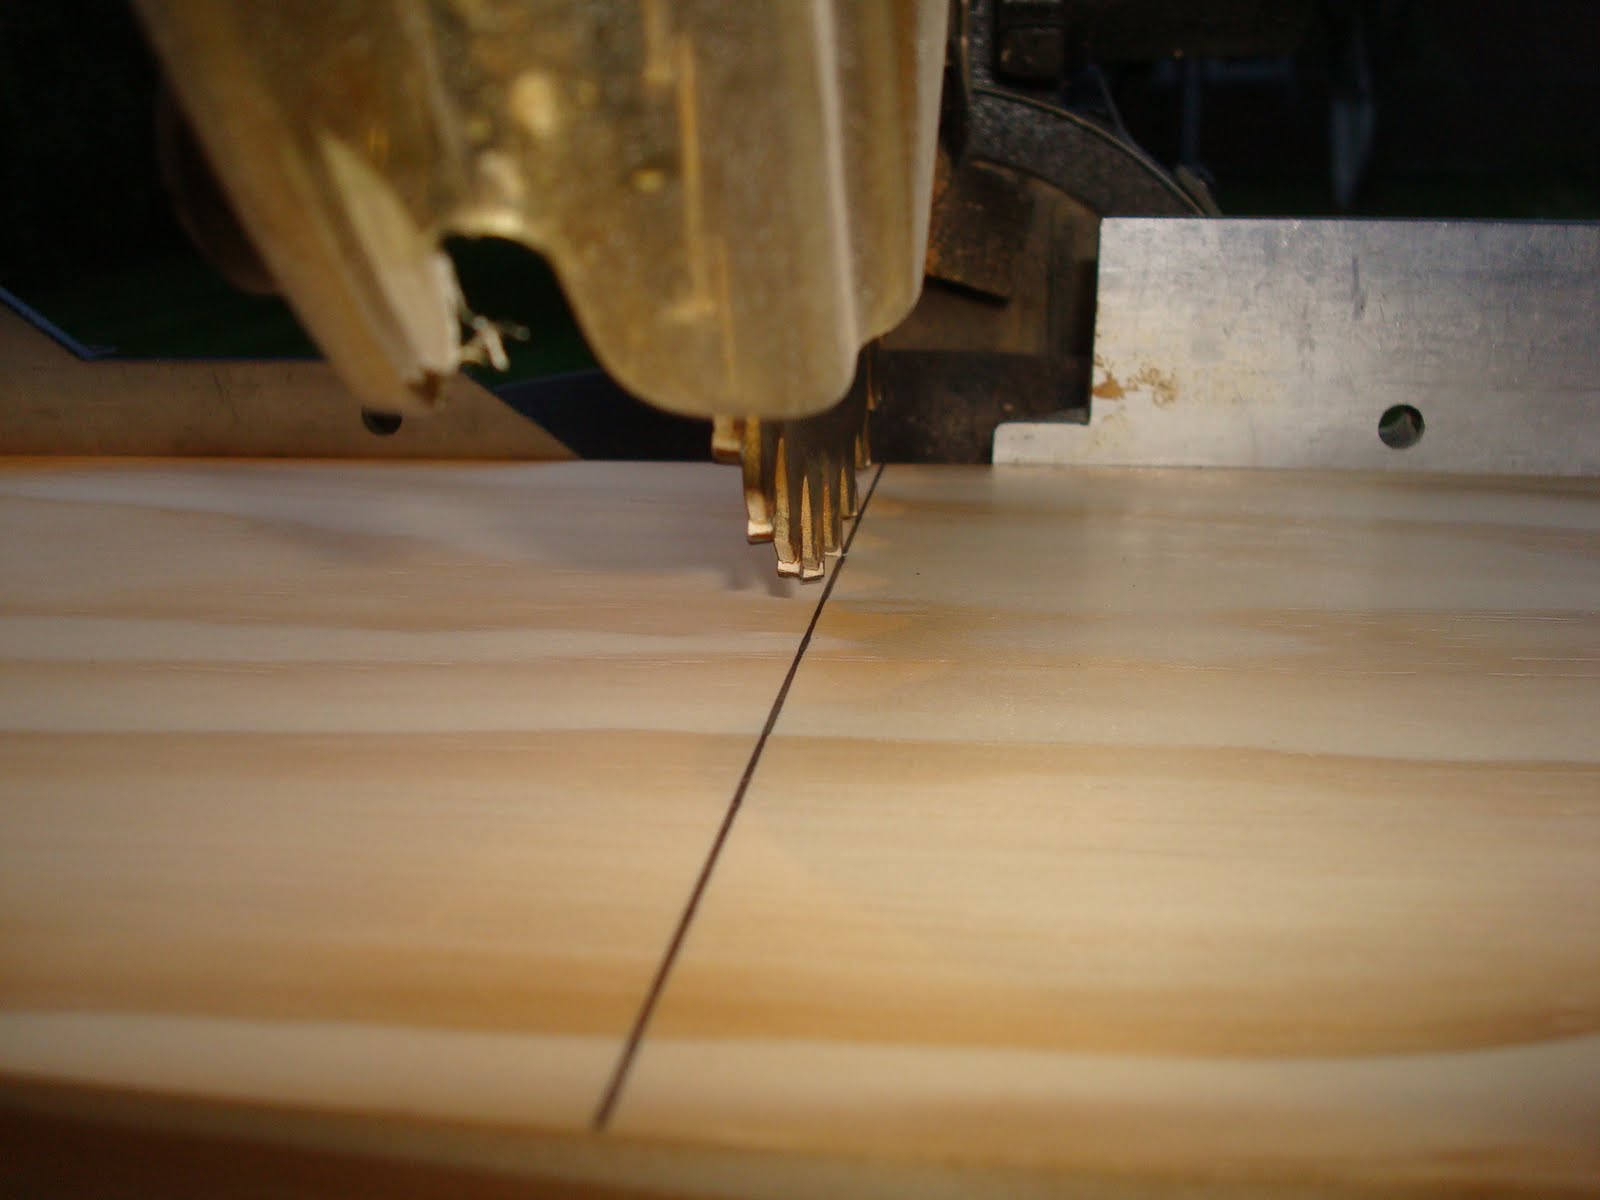
 Once you pick your size for your side pieces you need to cut them with your table saw:
 Cut pieces:
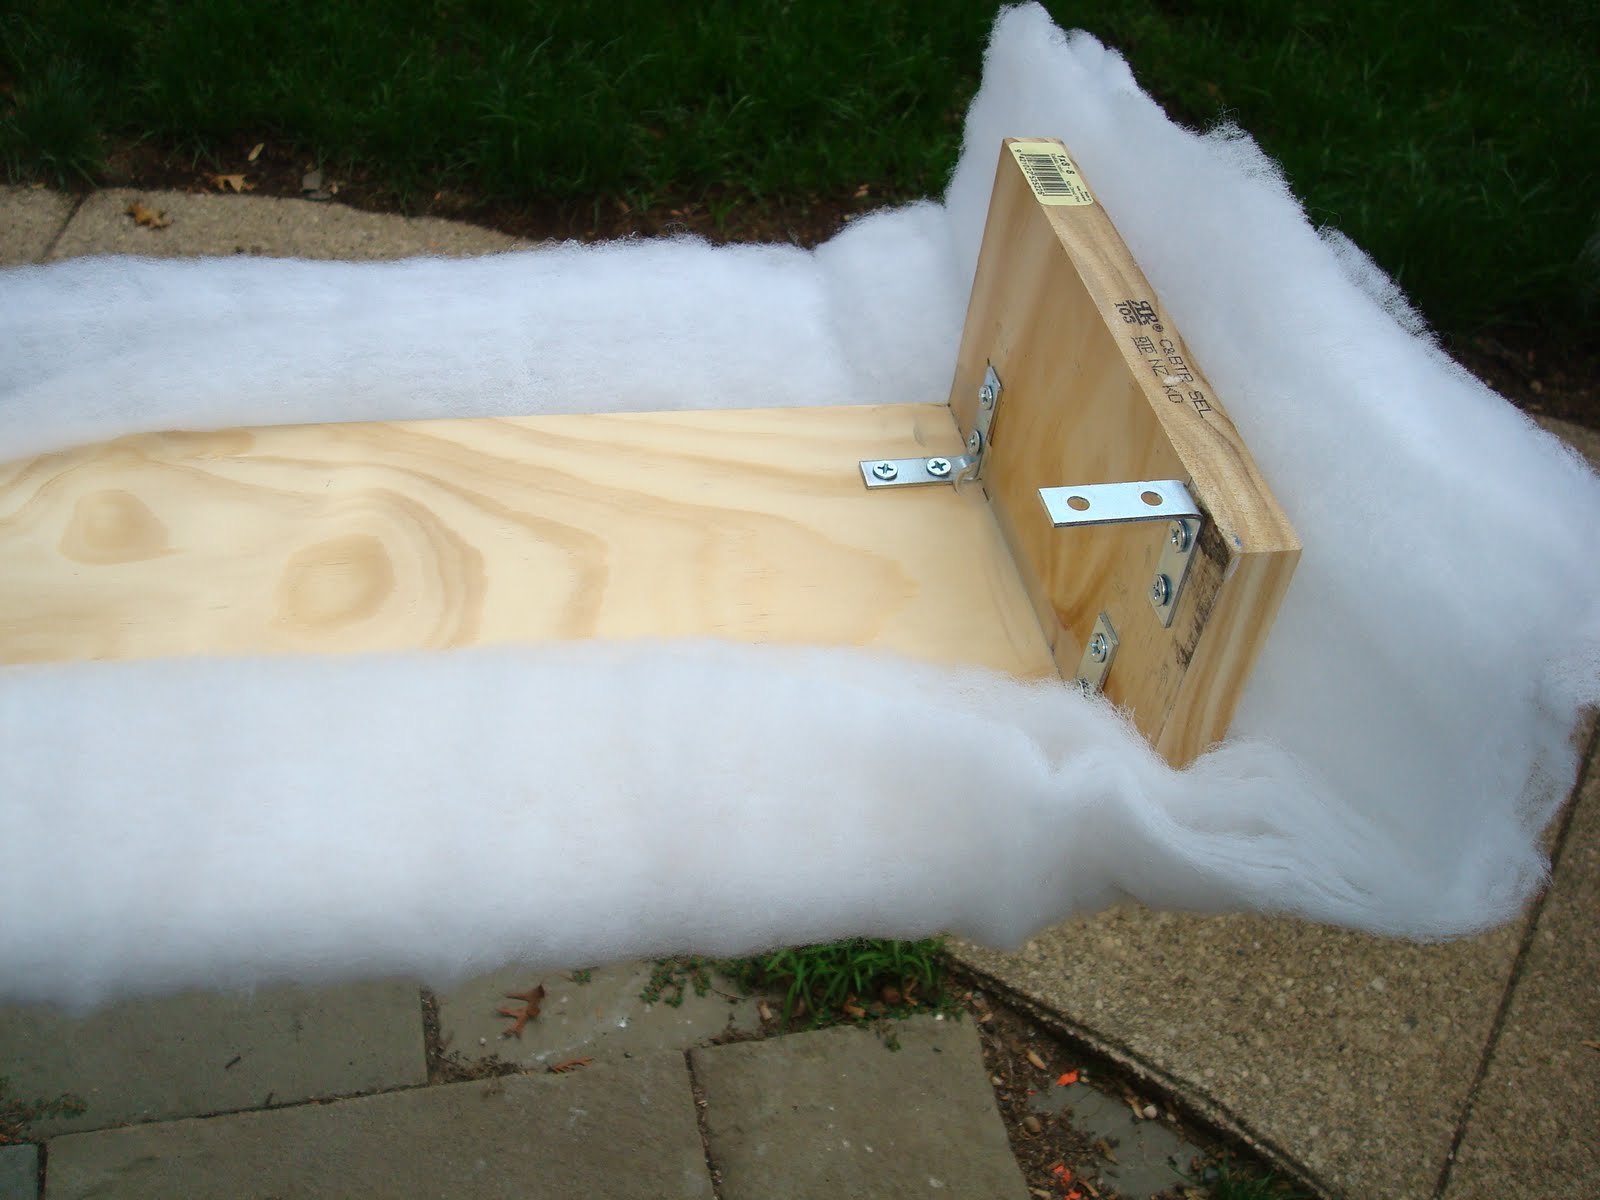
You will then use your liquid nails to hold the two pieces of wood together and start to nail it in place:

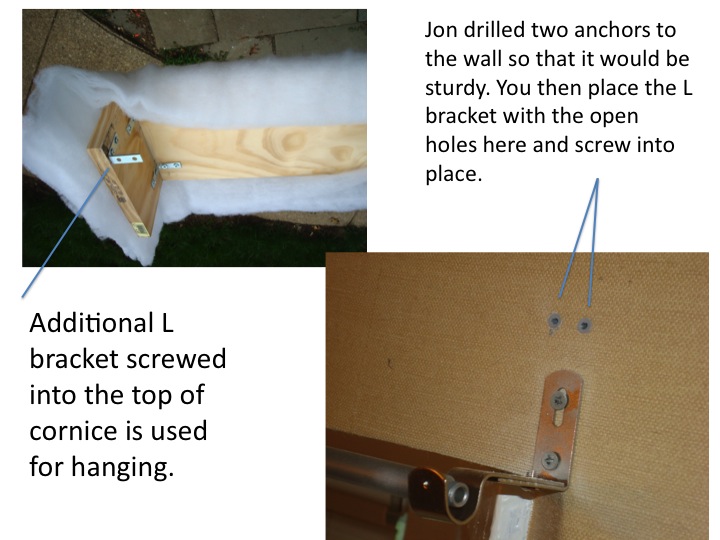
Then you can add your L brackets for support:

Now for the fun part adding the fabric! I picked a neutral for my window panels so I knew I wanted to keep it neutral on the cornice. Since I knew it would be hard to find a fabric that totally matched in shade and texture I ordered one additional panel in the 108″ length and used that as my fabric to wrap around my cornice. It was the perfect solution!
Before you add fabric you need to add a cushioning so with some quilting batting and spray glue you can get to work:
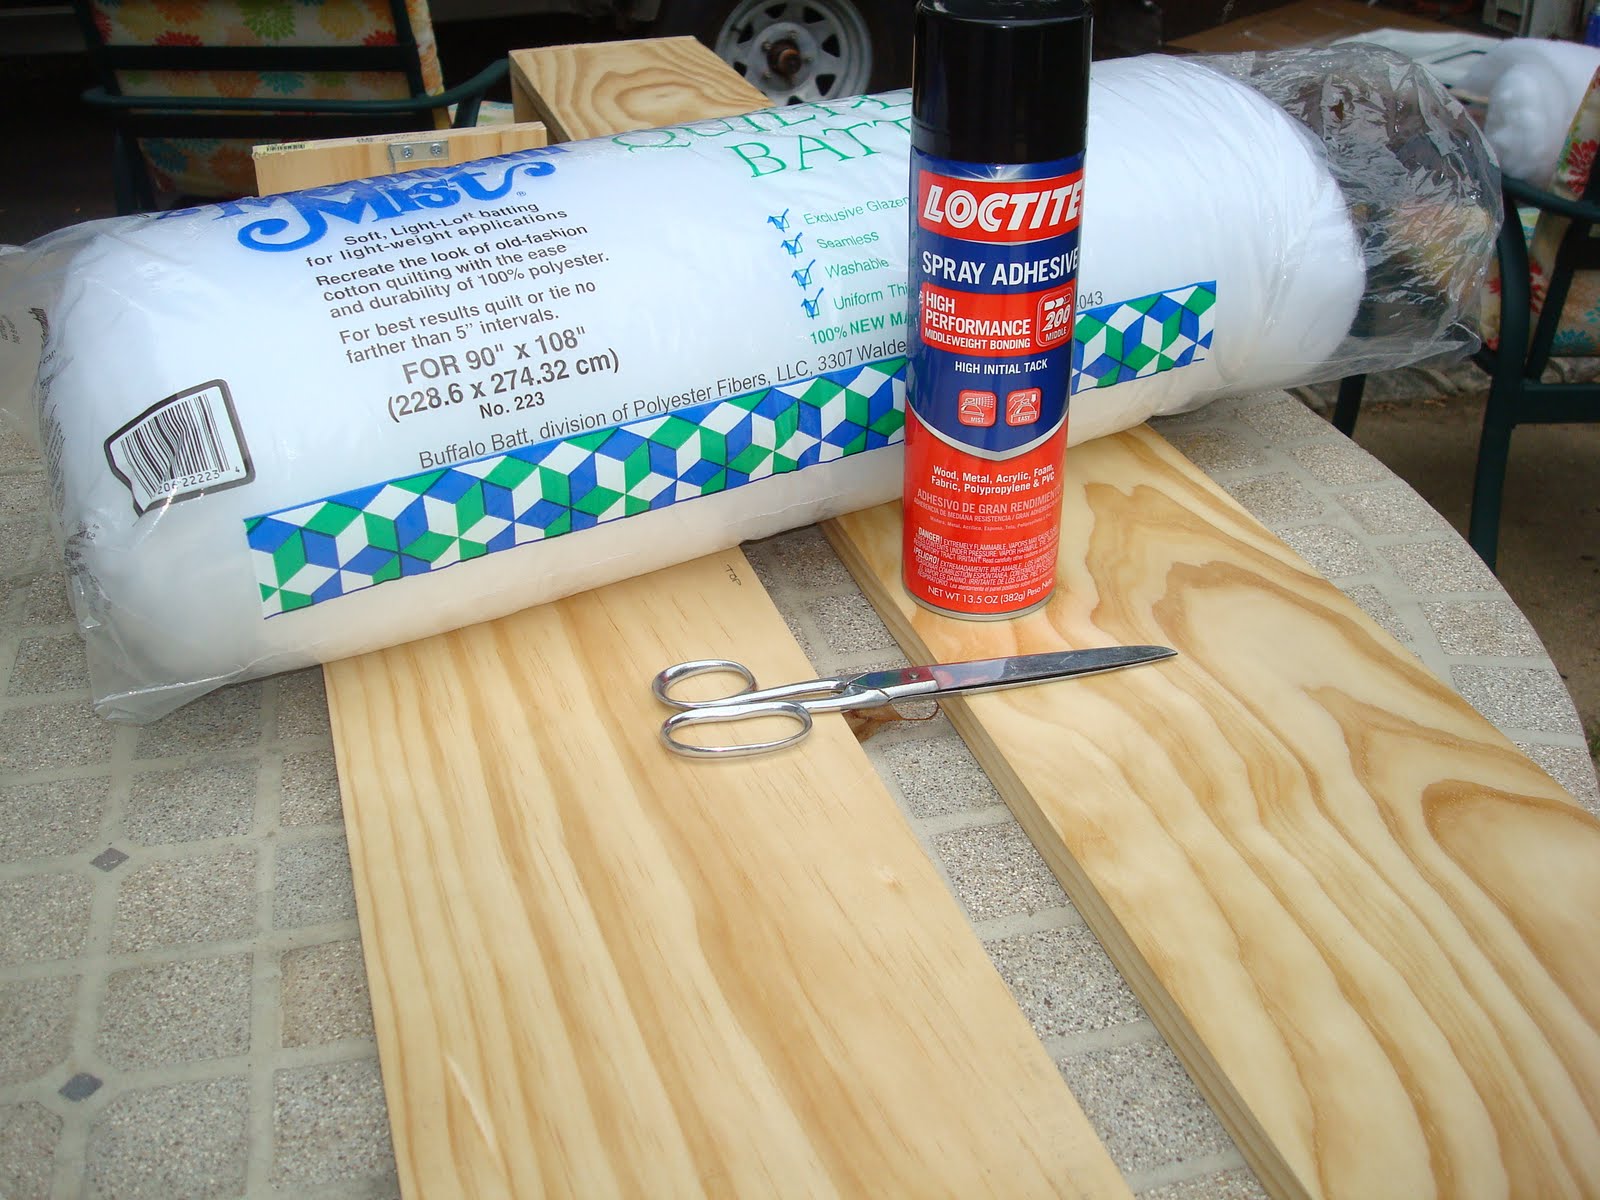
We did this outside so that spray glue wouldn’t get all over the place. You never think it’s going to get everywhere, but based on numerous past experience it totally does so if you can spray outdoors I would do so.

Then wrap your wood cornice:
Almost finished now! Now make sure you’ve ironed your fabric and cut it to size and you can start stapling it on:
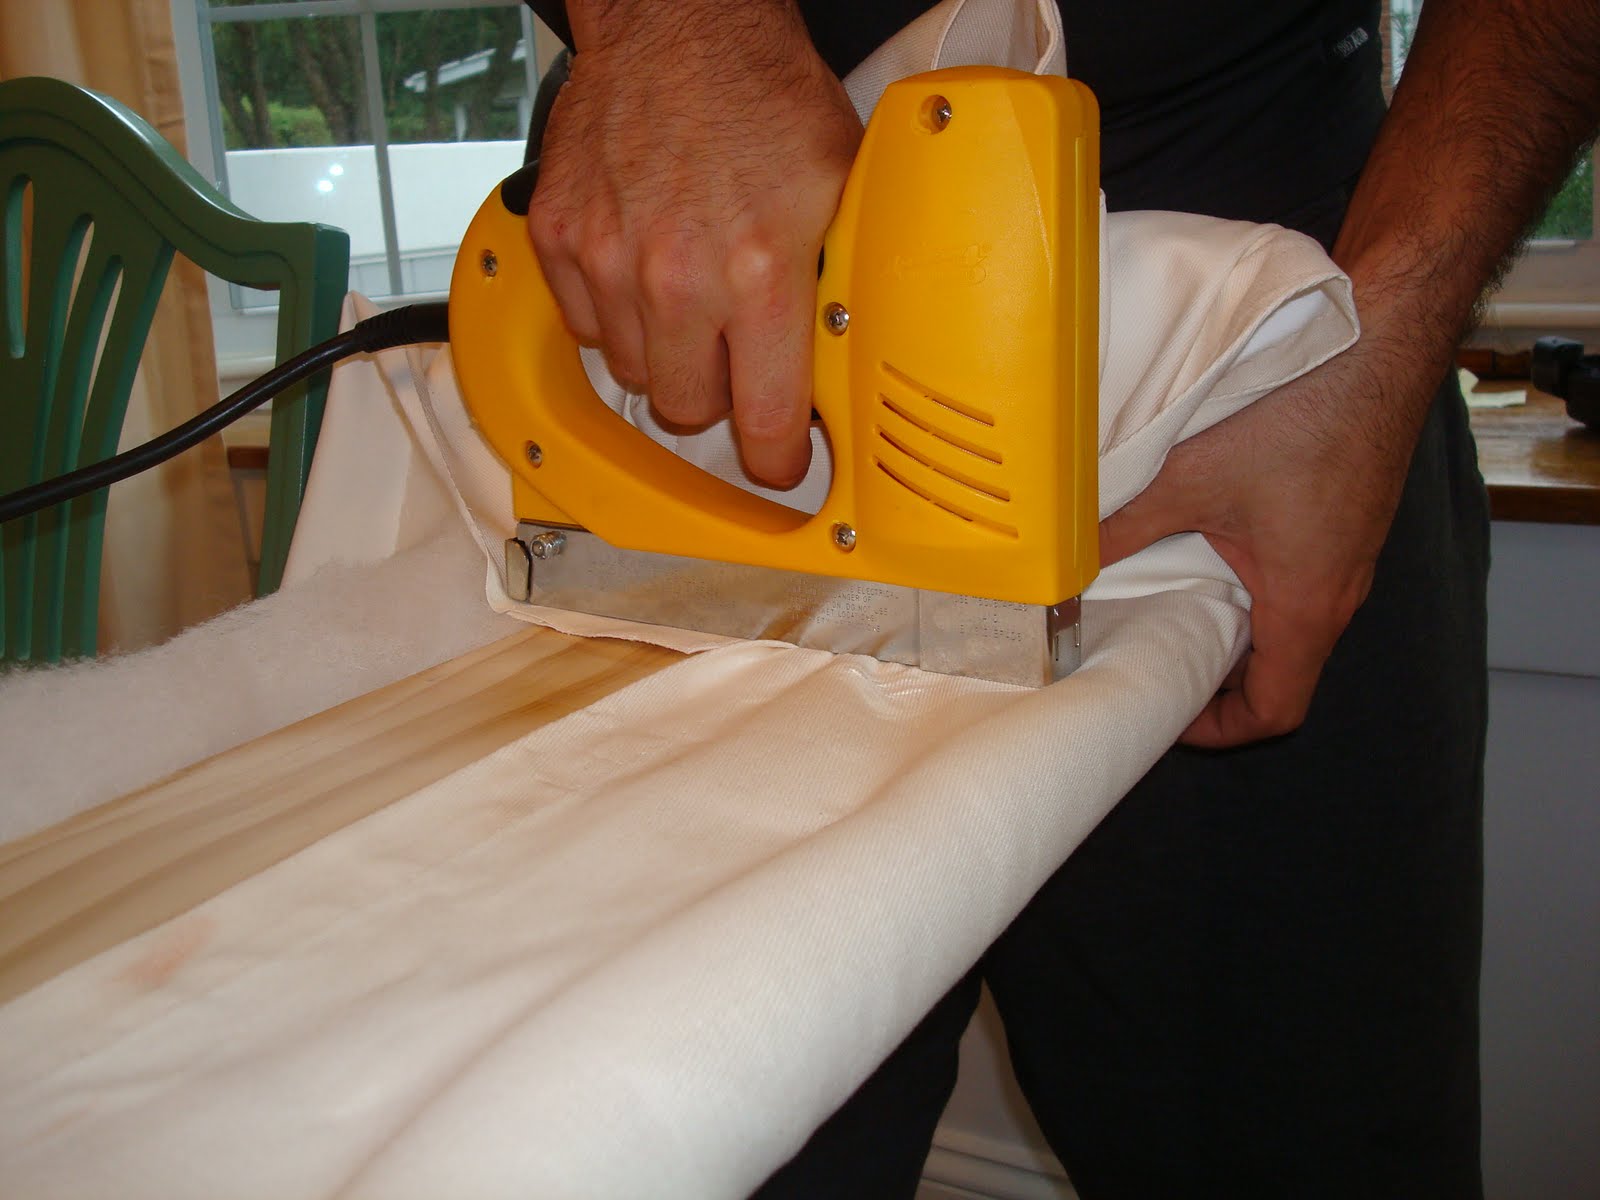
Once you staple it into place you are all finished!
Here is a little design tip that I used for my window situation. You all know I hate short window panels. Well of course in my excitement of ordering my window panels on a crazy sale I ordered the 84″ length when I really needed 86″!!! Whoops! Turns out 86″ version didn’t exist anyway and the next size up would have been 93″ and therefore require some hemming. I didn’t want to hem so I stuck with the 84″ and due to my cornice and some clip rings I made it work!!!
Clip rings totally saved they day! I bought a bunch of inexpensive ones at Ikea and went to town! Now my curtains just kiss the floor:
 Here is my before:
And the after:

Another tip into helping your curtains look like they were custom made is the fullness of the panels.The number of panels used to cover a window should be enough fabric to cover two times the width of your window. I ordered 4 curtain panels to get the amount of fullness for my bay window.
How to hang on wall:
Leave a Reply
get inspired with our own home tour
ON THE BLOG


My living room is one of the rooms that evolved drastically from when we first moved one. Originally I painted the walls chocolate brown and did accents of white, blue and orange. That lasted maybe 2 years.

Our dining room sat empty for months. Okay maybe it was empty for just a handful of weeks and then we couldn’t take it anymore and put in a folding table and plastic outdoor chairs, but in my mind that was still empty.

On the main floor of our house we have a Florida room. Being that it’s a Florida room it is a considered a 3 season room, because there is no heat in the room. The previous owners used it as an indoor patio with outdoor furniture and it looked like this when we moved in.


That looks fabulous, Camila!! I hereby crown you DIY queen!
Camila, will you come do this in my apartment? These look INCREDIBLE! xoxA
I think these are absolutley fantastic, Camilla! I know they are simple (as in, not the most complicated project you have ever completed) but I'm pretty sure this is my favorite DIY you have ever done. I want cornices now! Love this!
When I saw your windows in your post yesterday, I was hoping you would provide us with some DIY instructions! Thanks so much!
Very cute. But I need to see a picture of how they kiss the floor.
This looks great!! And your post was full of TONS of great tips! Thanks 🙂
Thanks guys! I will totally add a picture of them kissing the floor. At the moment the whole dining room is bit trashed from said project so once I clean it up (fingers crossed today) I can take more pictures.
It would also help if the sun came out so that I wouldn't need to use flash.
Great solution to hang drapes on a bay window, looks wonderful! Janell
I LOVE these curtains! Looks amazing! We actually made very similar cornice boxes last weekend, but now we can't figure out how to secure them to the wall. Could you explain how you secured your cornice to the wall? I see you have your L bracket on before adding the fabric, so how did you get your fabric so smooth? Thanks for posting this! i'm obsessed!
Now THAT is the way to do a valance! I tried creating something similar to this a few months ago and did not succeed! I wish this post would have been around back then! haha! lovely! This is a beautiful solution to working with bay windows…
Here is my post:
http://abodelove.blogspot.com/2010/09/im-just-not-that-into-you.html
Look great! Thanks for the tips.
Teresa
How did you mount them to the wall? I'd like to do something similar in my kitchen, but I can't figure out how to get the piece up on the wall.
You make everything look so easy! I love seaing all your DIY projects…keep em coming!
So pretty! I agree the more panels on the window the merrier it will look
SUPER PRO and so chic!
When I was in interior design I would be embarrassed to tell my clients how much their 'window treatments' were going to cost them. One living room we did in Greenwich had over six figures worth of drapes! Yikes!
I'd rather spend my money on daffodils and have you come over :^)
Wow, that cornice makes a huuuge difference! Ok, I'm trying to wrap my brain around your final tip….your panels should EACH be 2 times the width of the window? What if the wall on one side of the window is 10" wide and your window is 3'?
xo, cass
love it!!
I believe Jon simply hung it with another L bracket that you can see in the image of the wooden cornice being wrapped in batting.
He is coming home for lunch in a little bit so I'll ask him and get more details and then post on it.
🙂
Also do you recommend that electric staple gun over one that uses a compressor? What brand is it? I have had bad luck with manual staple guns and need to buy a new one. Thanks for all your answers!
I agree that JC Penney has a great window treatment selection – especially the hardware. Your drapes look awesome, and major props go to your super-helpful hubby for going to town with that batting and glue!
love them, great job!
While I would have added some trim I think you need some pretty tiebacks to allow that gorgeous view and fabrics to show. another tip, if your drapes are too short add a panel of coordinating fabric or trim for the extra lenght needed.
Great job. Another question- who makes the grasscloth in your room, and how can I get some?
Ok! What you just did is amazing! You are so talented…hubby too! I love how it turned out! Great job!
Thanks for all the sweet comments!
I'm thinking about adding trim. Not sure if I want it or not. I have some already purchased just deciding if I want to pull the trigger and actually use it. We shall see.
Way to rock those ready mades! I agree…custom window treatments are very expensive and I think with a little effort you make ready made curtains look fabulous. You certainly proved that with yours.
Great job! I love the outcome.
Looks phenomenal! Way to save a few hundred bucks!
Thank you so much for posting on how to hang on the wall. We secured the fabric before screwing the L Brackets, so when we tried to screw them in, it twisted the fabric. I will just remove the fabric and re-do.
Thank you so much. i just love it all. you are a genius!
Love all your DIY's-always impressive. What a clean chic look!
Great DIY tips, and of course, your projects ALWAYS look Pro!
Gorgeous! I love it & I want to try it ASAP. Now all I've gotta do is find myself a nook.
Oh right, my apartments tiny and I haven't any nooks to spare.
Guess I'll just need to save it in the inspiration folder.
look at you all DIYing again- love this project, I cant wait till i have my own house to use it in 🙂
I was debating on whether or not to do this in my dining room. Decision is now made. I have a great shower curtain that I bought at Target that I didn't know if I wanted to just use as a panel or not. I can't wait to get this project done now! Thanks!
Your cornice is beautiful! Thanks for the tutorial! I'm really wondering where you found that great ikat fabric on the pillows though 🙂 I've been looking for the perfect ikat for my living room and not having much luck…
Wonderful job Camila! You saved a TON of money with that handy hubby of yours. Great job as always!
I wish my husband was as DIY as yours!