DIY: No Sew Box Pleat Valance
I’m still not on good terms with my sewing machine so I’m always on the look out to figure out no sew solutions to get my custom window treatment fix.
This project took a couple of hours, but was really simple.
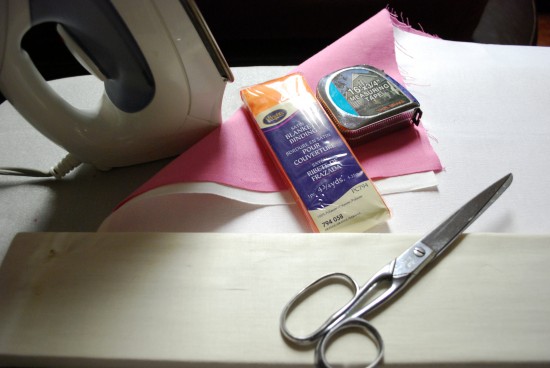
Here is what you need:
– 1/2″ thick mounting board that needs to be covered in neutral fabric. Length of board is determined by window size. Add extra 2″ to the window size for easy installation. When measuring the window you need to measure from outside of trim to outside of trim.
-Qty 2: 2 inch L brackets per window
-Iron
-No Sew tape
-Scissors
-Tape measure
-Fabric
-Lining fabric. I went with outdoor canvas which is stiff and great for forming the valance.
-Blanket binding
Step 1: Cut your fabric to size. You will need 3 separate panels. One for the main section of the board and two smaller sections for the sides. Measurements depend on the size of your window. It will vary for everyone. Now remember the top of the board is going to be covered with your fabric as well so when you are deciding on a width make sure to add a couple of extra inches to your measurement.
For example if you have a 34″ long window then you will need a 36″ long board that is 3″ wide and you want to have the valance hang 10″ long you need to cut a piece that is 38″ long (this allows for a 1″ hem on the sides) and 15″ wide (This allows for the 10″ for hanging, the 3″ to cover the top of the board , an 1″ to staple on the back side of the board and an 1″ for hemming the bottom of the valance.
*Sounds complicated, but once you see the pictures below it will all make sense.
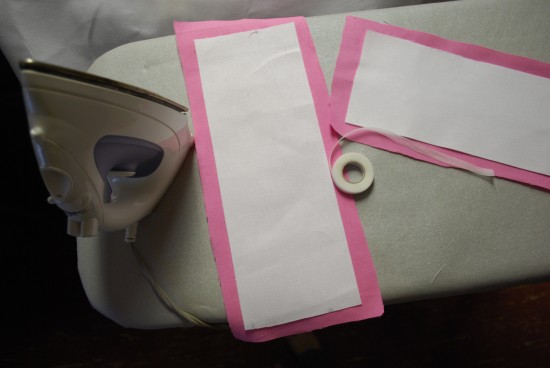
In order to give my window treatment more weight I lined my fabric with outdoor canvas.
In order to get a nice crisp hem with my no sew/iron on tape I made my lining fabric an inch smaller. Hem the sides only and wait to do the bottom hem until the main piece is stapled on to the board.
When you cut the sides make sure to make the panels 2″ wider in order to have some fabric to wrap around the front and give the box pleat look. Again remember you need some extra inches for hemming.
For example if your mounting board is 3″ wide then you need to cut a piece that is 7″ wide ( 1″ to hem the back, 3 ” for the width, 2″ to wrap around the front and 1″ to hem the front.) For the length we still need to get to 10″ for our finished length, but it’s a bit different than our main panel. You need 2″ to staple the side on to the mounting board, 10″ for length plus 1″ to make your finished hem for a total of 13″.
*We hemmed the sides on the side panels and then waiting to hem the bottom once the side panel was stapled on. It makes it easier to ensure you are at 10″ inches.
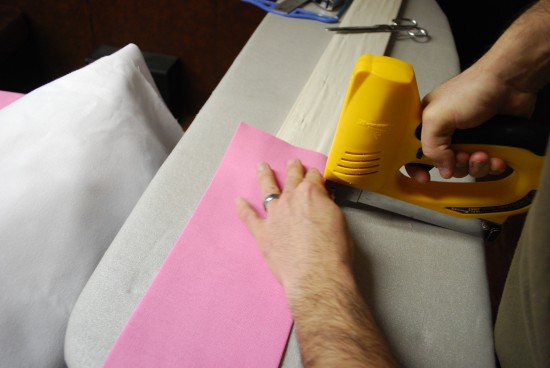
Step 2: Once all of the measuring and cuts are made the hard part is done. With all of the pieces hemmed (except for the bottom hems) you can now start stapling them on to your board.
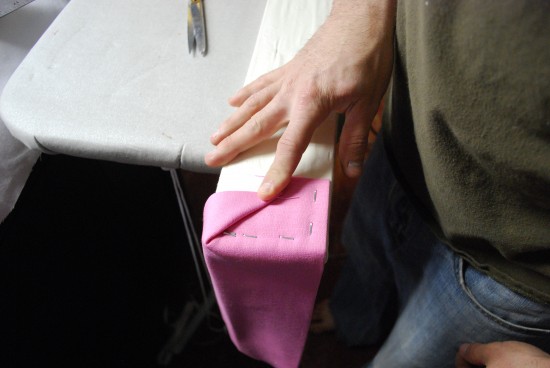
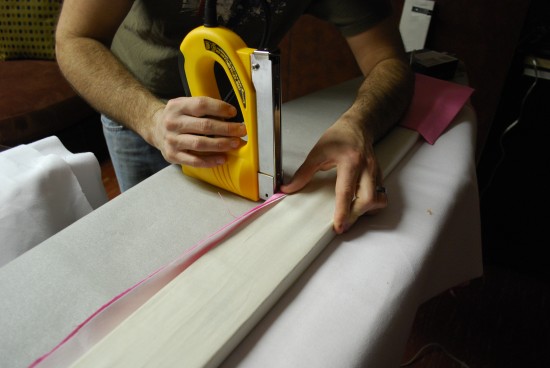
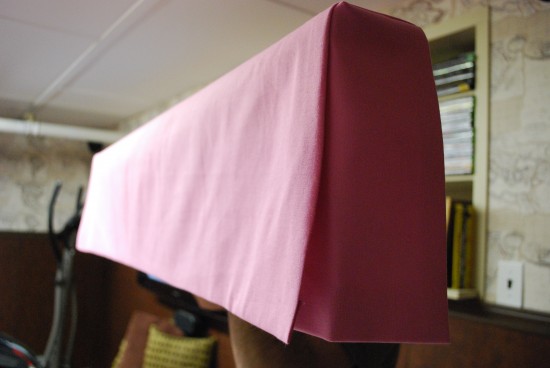
Make sure to staple your side firsts. The main panel will lay over the sides and give a crisp/clean finished look.
When turning the corner just wrap it like a present and staple away:
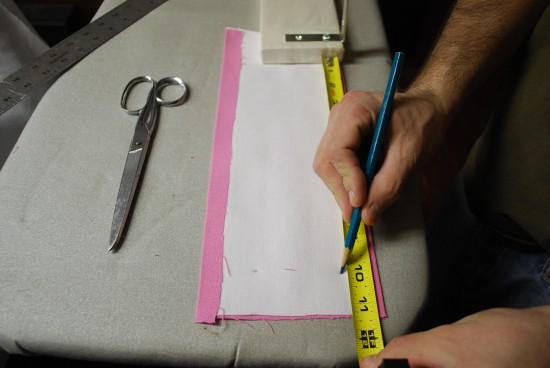
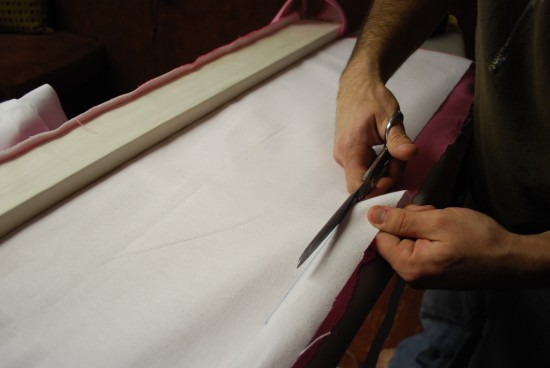
Once the side panel is staples on top you can now hem the bottom. Measure out to 10″ and make a mark:
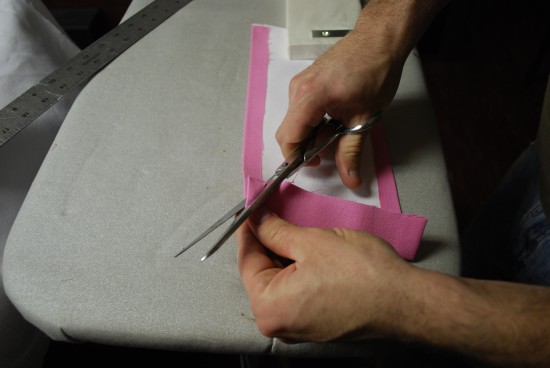
To get a crisp edge on the sides make sure you cut the edges on an angle.
Repeat the steps for the other side panel.
Step 3: Attaching the main panel. You will first staple the panel onto the edge of the mounting board.
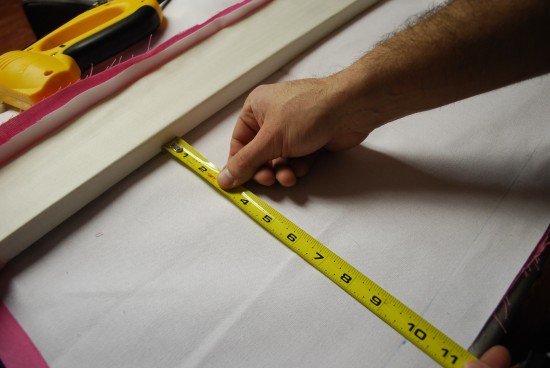
Once piece is stapled on to the board take your tape measure and mark 10″ from the bottom edge of the board:
You can cut the the lining fabric at the 10″ mark. You will have an inch of the pink fabric remaining that can now be folded over the edge of the lining fabric and hemmed perfectly at 10″.
I used iron on hem tape for everything and once you are done ironing the hem on the main panel you are almost finished!
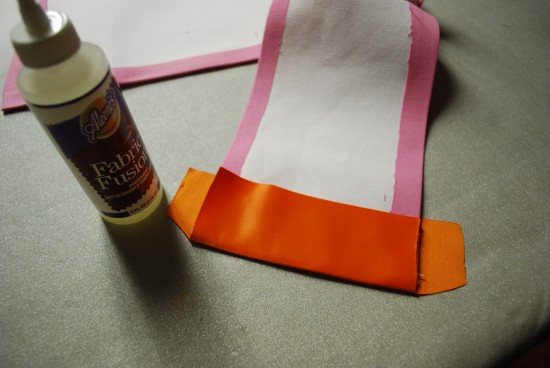
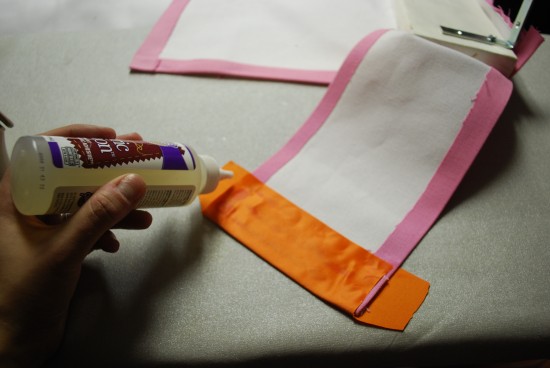
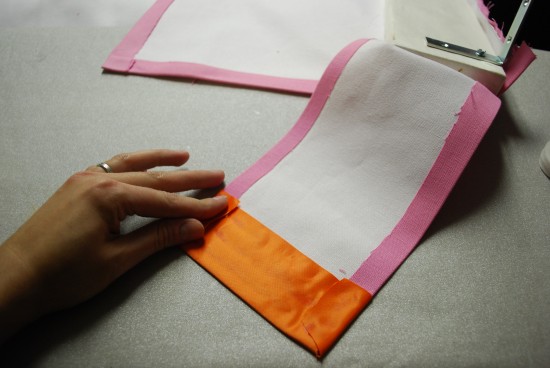
Now you can leave the piece as is and hang it, but we wanted to add a contrasting color. The blanket binding was the perfect solution for this. It gave me my contrasting color, it was inexpensive and it gave me a nice finish and no measuring was necessary.
A picture is worth a thousand words so instead of heavy copy trying to explain how we added on the trim check out the following pictures:
Once that’s done you can do the same to the other side and then main panel.
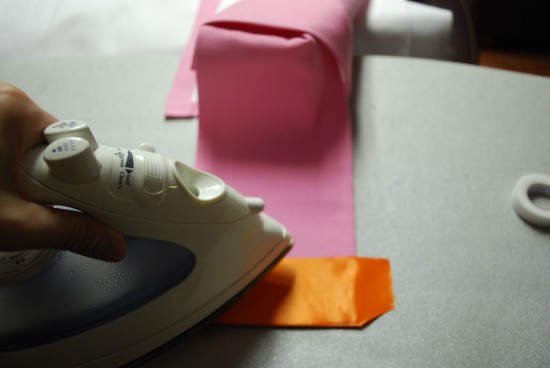
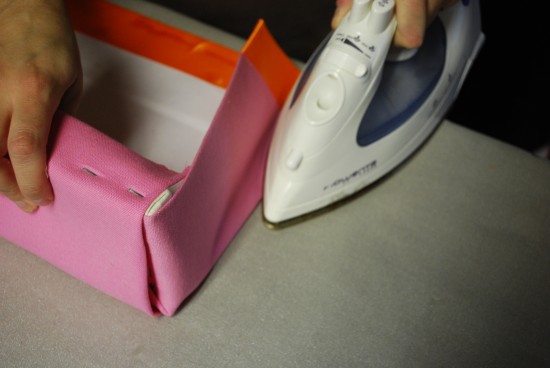
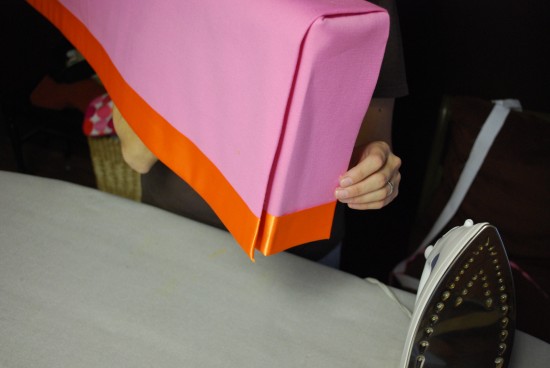
In order to get a crisp finish on the box pleat we used our iron to work on the sides:
Voila:
*We used fabric glue to attach the blanket binding to the back of the fabric panels. No real reason for it. We were just running low on the iron on hem tape.
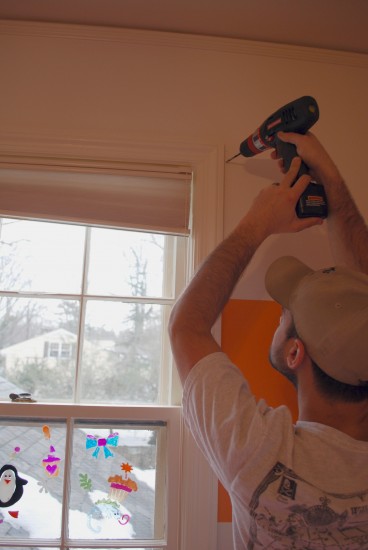
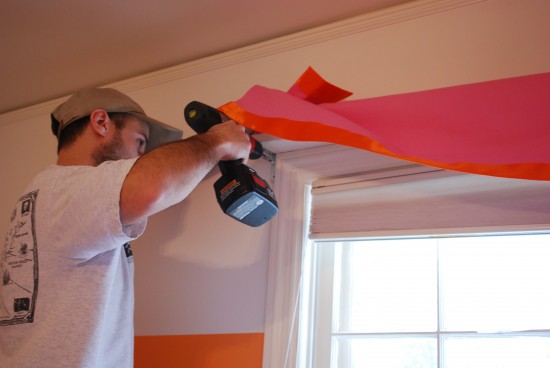
Here is how you hang them up:
Place holes for L brackets on the sides of the window trim:
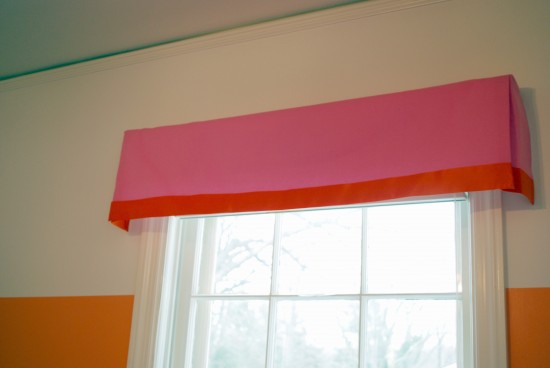
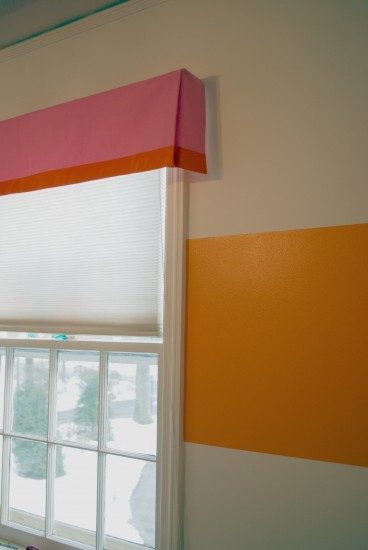
All finished:
I’m not going to lie the project is a bit time consuming. It took us about an hour and half per valance, but cost wise it’s worth it.
Budget Breakdown:
2 yards of pink canvas: $16
1 and half yards of white outdoor canvas for lining: $14
1 package of blanket binding: $5
Package of iron on hem tape: $ 9
We reused the mounting boards: Free
Total: $44 for two valances.
If you have any questions leave them in the comment section and I will be answering them there. If you made it through this huge post then Bravo!
Related
Leave a Reply Cancel reply
get inspired with our own home tour
ON THE BLOG
My living room is one of the rooms that evolved drastically from when we first moved one. Originally I painted the walls chocolate brown and did accents of white, blue and orange. That lasted maybe 2 years.
Our dining room sat empty for months. Okay maybe it was empty for just a handful of weeks and then we couldn’t take it anymore and put in a folding table and plastic outdoor chairs, but in my mind that was still empty.
On the main floor of our house we have a Florida room. Being that it’s a Florida room it is a considered a 3 season room, because there is no heat in the room. The previous owners used it as an indoor patio with outdoor furniture and it looked like this when we moved in.
In our new home, the basement was completely unfinished. It was literally one of those dark spaces that you see in horror movies and are terrified of getting locked into. However, with the square footage in this house, I knew I needed to make the basement another workable and liveable floor of the house instead […]
What to look for when it comes to picking out kitchen appliances: Leave room in your budget for appliances. When it comes to kitchen renovations everyone knows that the cabinetry and the labor of demoing and installing cabinetry is going to eat a lot of your budget. However, the second most expensive part of a […]
I don’t think I’m alone in thinking that designing a kitchen is an overwhelming undertaking. I’m an interior designer and even I find it stressful to iron out all of those details. So, when it comes time to design a kitchen I always like to partner with a kitchen designer to make sure I’m remembering […]


Can you come over to my home an help me with my valance? 😉 Yours looks fantastic!!
love em! a woman after my own heart. never buy it, always make it 🙂
Awesome! Great instructions as well. I hope I get around to trying this out.
Good ole Heat and Bond. Is this going in the baby girls room?
Mr, Goodwill Hunting
Another fantastic idea! Love it!
Love the tutorial but I need to ask…..what is mounting board? Is it wood? Foam core? I haven’t heard of it so I want to be sure I am buying the right materials.
Thank you,
It’s just a piece of wood from home depot that is then wrapped in fabric.
The length depends on the window, but the width is 3″ and the the thickness is 1/2″.
The measuring is the really annoying part. Once all of the pieces are cut and you are just using the iron hem tape and the stapler it’s pretty painless and a really pretty result.
Great — just when I decided on making a pelmet for my daughter’s window…you go and show us this genius project! Think it would be a bear to tackle this with a patterned fabric?
Jon actually thought it might be easier to do it with a pattern. It would be helpful for making your folds for your hem lines.
Great job! love the orange and pink color combination!
Beautiful. I’ve been looking for a way to hide the tops of my mini blinds without resorting to curtains. Thanks for the info.
Beautiful, Camila! Question: If I wanted to add curtain panels under the valence, would there be any reason not to use a simple curtain rod? Would it interfere with the DIY valance?
This is ab-fab! I was imagining something just like this, only needed to see the photos to visualize how it would work. Oh, and to convince my boyfriend that it’s not a crazy idea. 🙂 Thanks!
$44!! That’s amazing. They look fantastic.
love it I too have been looking for a simple way to make a valence. could you just add an inch or two to the width so you would have space to add curtain rod for sheers to be hung
Is there a specific reason why you go through the trouble of creating a mounting board? Wouldn’t it be easier to use a regular piece of wood or even a primed piece from Home Depot if I wanted it white? Not seeing the purpose in the step…am I missing something?
Love this. I just posted the picture (and credited it to you) linked it to your tutorial. Might be trying this out this week. Thanks!
Thanks for this brilliant tutorial! Followed your instructions to make one for my foyer and it’s looks awesome!
Yay! Send me pictures!
Would there happen to be a video to follow? I am trying to follow the pictures and I don’t see when the brackets should be added to the board. It looks like the brackets are added before stapling.
Any help is appreciated!