DIY: No Sew Fabric Applique Monogram
This project has been sitting around my living room waiting to get done for the last couple of weeks. I was constantly walking past it thinking today is the day it would get done, but work always got in the way.
After my shower I had a lot of extra Heat and Bond Ultra Hold and even more emails asking for me details on the onesie/bib decorating station. So instead of making a tutorial with a onesie I decided to make a design related post to keep everyone interested.
This project took at most 1 hr and I was able to do it all alone without shouting SOS for Jon’s help.
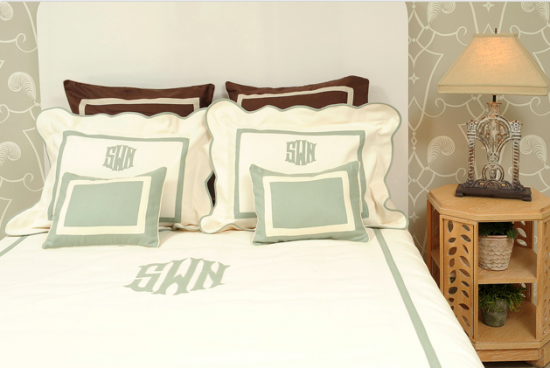
I have always loved the look of Leontine Linen’s Abigail fabric applique monogram:
I even toyed with the idea of splurging on some bedding a while back and had them do a mock-up for me with our initials:
Oh swoon, but once I added up how much everything would be I knew it wasn’t a right now purchase and I would have to wait. I didn’t want to waste that beautiful handmade monogram so that’s what I used for this little project.
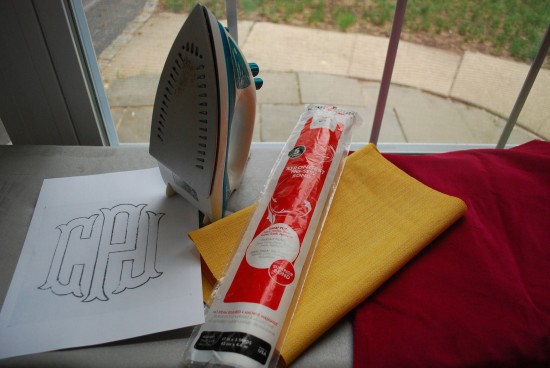
Here is what you’ll need to recreate this project yourself or use the same set of instructions for a onesie/bib decorating station:
Supplies:
Mock up of your design/monogram or just use a stencil
Heat and Bond Ultra Hold
Iron
Two types of fabric
Scissor or exacto knife
Step 1: Apply Heat and Bond Ultra Hold to the fabric you want to use for the applique. Make sure you apply paper textured/glue side down on the back side of the fabric. You will be ironing over the paper backing.
Let cool.
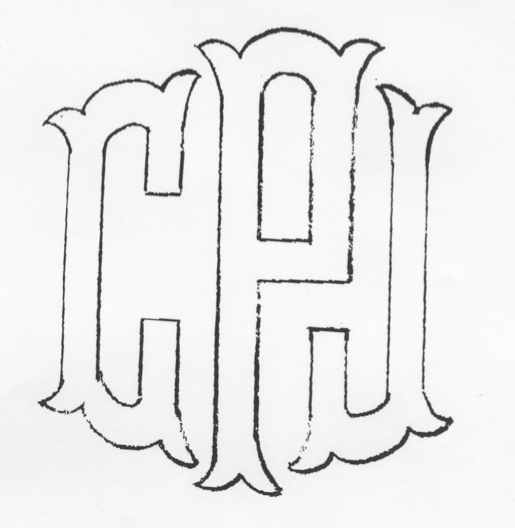
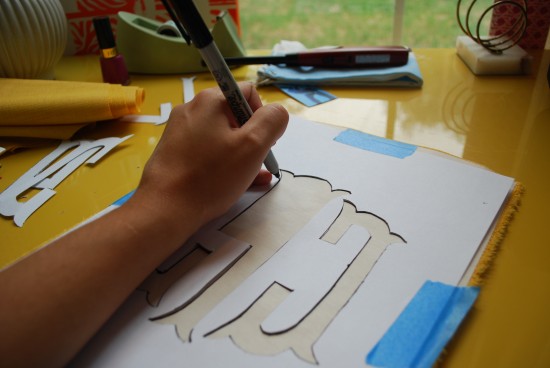
Step 2: While fabric is cooling ( estimated time 1 min) you can go ahead and cut out your monogram/design and make a stencil out of it. For the shower we provided guests with stencils or the opportunity to free hand design anything they wanted. For this project I had the monogram, but no stencil so I made sure to print it out on cardstock so I could make a stencil myself:
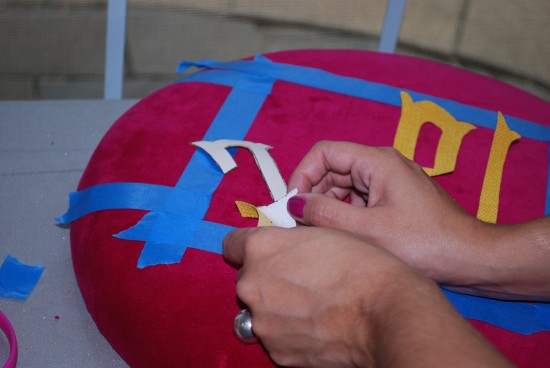
Step 3: Now that your stencil is made the fabric has cooled you can apply the stencil to the fabric and trace out your design/monogram. When you are doing a monogram or lettering make sure you remember to place your stencil backwards so the letters appear properly. I also used painters tape to secure my stencil into the place, but not disturb the fabric/adhesive backing.
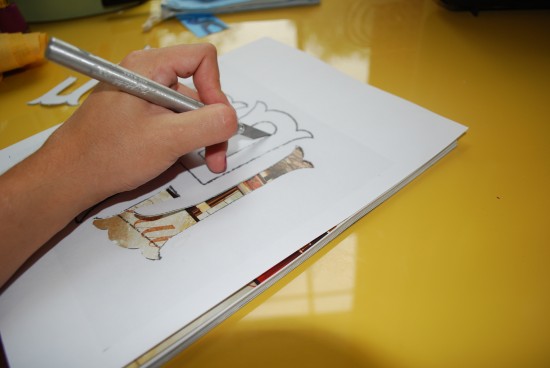
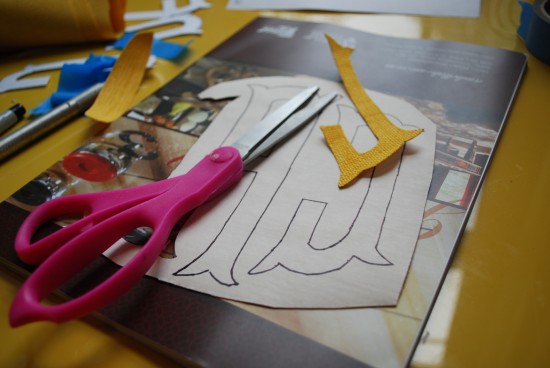
Step 4: Cut out monogram/design:
While using the exacto knife was really easy on the cardstock it didn’t fair as well on fabric so I switched to a pair of scissors. Make sure they are sharp and you shouldn’t have any issues.
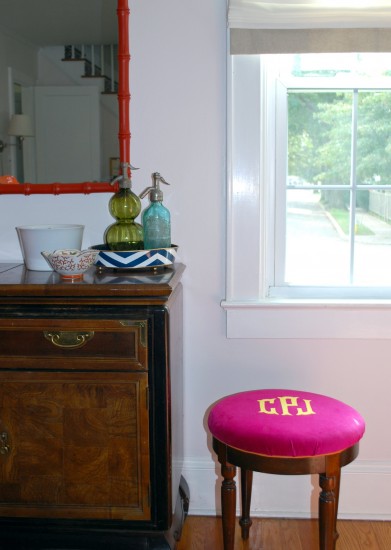
Step 5: Prep area for application. In this tutorial I was recovering this stool that I found in the trash!
After removing the cushion and then removing the old yellow vinyl covering I simply stapled on some new fuschia velvet fabric:
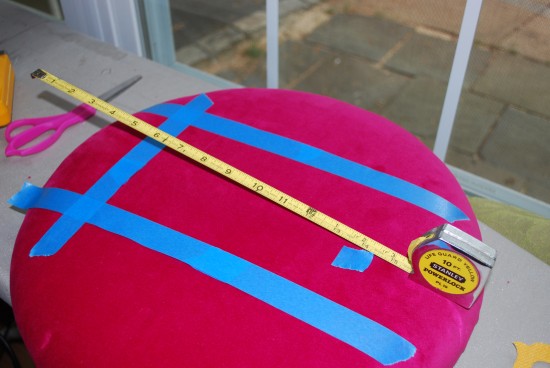
I could have added the applique first to the velvet fabric and then stapled it on the stool, but with stapling fabric tends to move and I didn’t want it to end up off center. Recovering the cushion first was the best solution and then I just boxed out the center of the cushion so that I could have a guide for my letter placement.
Step 6: Applying Fabric Applique Monogram or design:
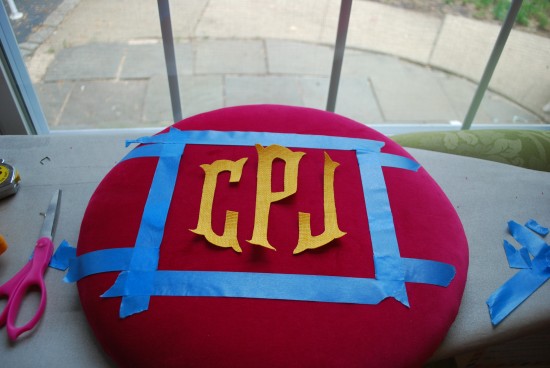
Simply place monogram/design where you want it. I then went and added little pen marks on all of the corners so I knew where everything went after I lifted up the letters to remove the paper backing.
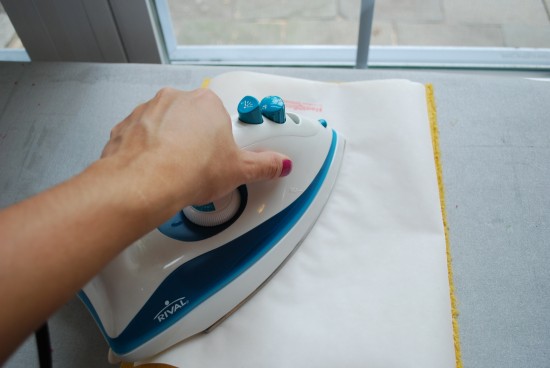
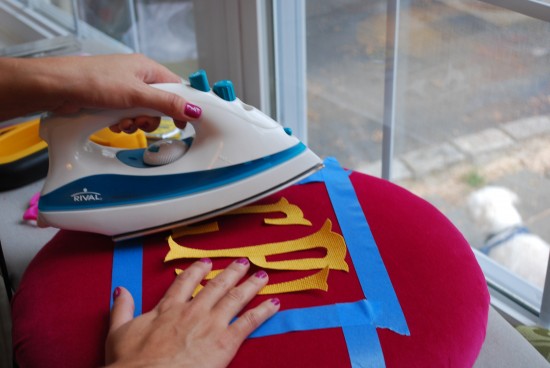
Then apply iron on medium heat for 8 seconds:
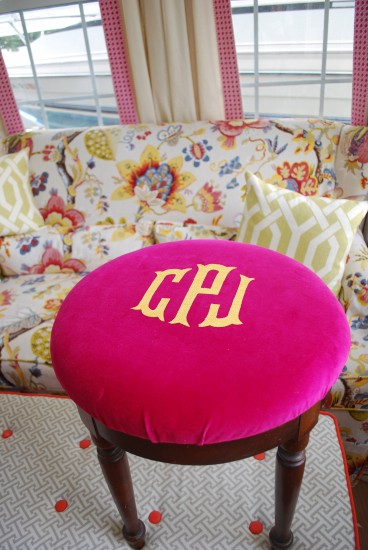
Step 7: Almost finished! If you were using this technique to decorate a onesie/bib then you would be all finished. If you are doing it to recover a stool or make a toss pillow then you need a couple more steps to finish.
{So pretty, but something was missing.}
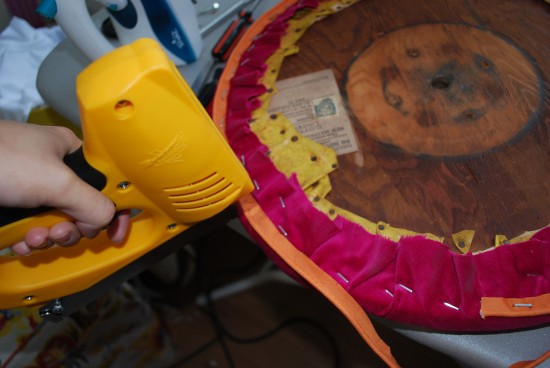
I love little details so when I found some orange piping stored away in my closet I knew I could use to finish off this project.
While the sewing machine and I are currently in a fight I’m not scared of the staple gun. To get the finished piping look I just needed to staple around my pre-made piping.
Step 8: Re-attach the cushion to the stool and enjoy!
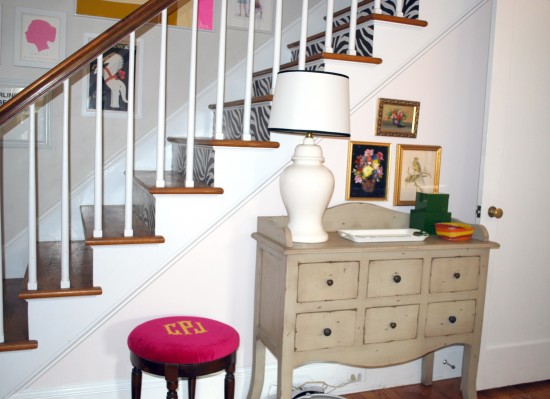
Or maybe I’ll enjoy it here:
{I tried it out here first, without the orange piping.}
Note: Originally I was going to apply the monogram applique before I stapled fabric onto stool and have my seamstress do a nice stitch around the border of the letters, but the instructions on the Heat & Bond specially tell you NOT to sew.
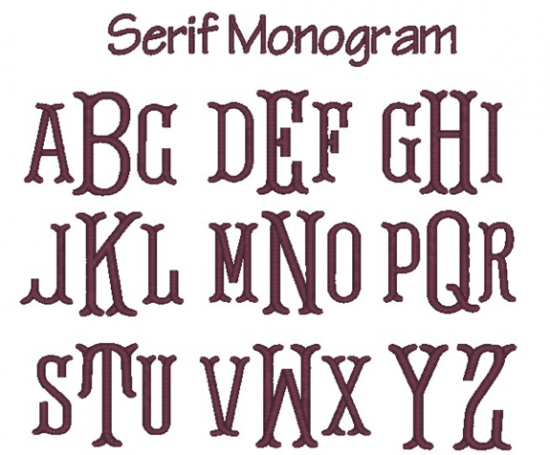
Now I know not everyone has a hand drawn monogram so I searched high and low for a font that you could download that would give you a similar look. I came up empty handed, but when I searched for monogram embroidery fonts I found something similar:
You could easily use the font above as a guide for your own hand drawn monogram or place it in photoshop or even MS Powerpoint and play around with the letters and sizing to get the arrangement you like.
Of course I still have dreams of my beautiful one day Leontine Linens bedding, but for right now the itch is scratched and my wallet is intact.
Related
Leave a Reply Cancel reply
get inspired with our own home tour
ON THE BLOG
My living room is one of the rooms that evolved drastically from when we first moved one. Originally I painted the walls chocolate brown and did accents of white, blue and orange. That lasted maybe 2 years.
Our dining room sat empty for months. Okay maybe it was empty for just a handful of weeks and then we couldn’t take it anymore and put in a folding table and plastic outdoor chairs, but in my mind that was still empty.
On the main floor of our house we have a Florida room. Being that it’s a Florida room it is a considered a 3 season room, because there is no heat in the room. The previous owners used it as an indoor patio with outdoor furniture and it looked like this when we moved in.
In our new home, the basement was completely unfinished. It was literally one of those dark spaces that you see in horror movies and are terrified of getting locked into. However, with the square footage in this house, I knew I needed to make the basement another workable and liveable floor of the house instead […]
What to look for when it comes to picking out kitchen appliances: Leave room in your budget for appliances. When it comes to kitchen renovations everyone knows that the cabinetry and the labor of demoing and installing cabinetry is going to eat a lot of your budget. However, the second most expensive part of a […]
I don’t think I’m alone in thinking that designing a kitchen is an overwhelming undertaking. I’m an interior designer and even I find it stressful to iron out all of those details. So, when it comes time to design a kitchen I always like to partner with a kitchen designer to make sure I’m remembering […]



I LOVE the fabric on your couch ! I have been looking for this fabric and a good price and can’t find it anywhere for under 28 a yard…..yikes. I only need 1.5 yards and was wondering if you had any left over that you would sell me? Love the monogram…I am going to do this for my next baby gift on a tiny baby t shirt.
Thanks so much.
Jennifer
Hi Jennifer,
I’m sorry, but I’ve never seen it for less than $28 a yard and I don’t have any left. I had to order 6 yards for my slipcover and it quickly disappeared and I don’t even have a left over scrap. So sorry. Hope you find it somewhere!
-Camila
What is the fabric on your sofa? I love it!
I am going to use this idea to make a little footstool for my daughter! She’s only 3 months old right now but I think it will be very handy in the future. Hopefully the Heat and Bond will stand up to infant/toddler use!
I believe it is Wonderland, by Braemore.
You had me at no-sew! I love this project!
That is the cutest thing ever! I am definitely trying this. Love your choice of colors.
Wow. I love how that turned out. its beautiful!
This is amazing! Since I don’t own a sewing machine (it’s on the long list) I am always excited to see “no sew” DIY projects. This one looks super easy, and it came out great! Thanks for sharing!
love! very cute.
I love this! You’re right–it was beautiful without the piping, but the little pop of orange put it over the top. It looks custom and tres expensive!
LOVE this! I used paint to make my monogram on that lucite stool I recovered, but now I’m thinking I want to remake it with some heat n’ bond and a fun colored fabric. hmmmm, ohh the choices.
Gorgeous!
Great tutorial! Thanks for sharing. Also…I’m in love with your stairs!!! Is that painted on or is it wallpaper?
The stairs are actually a decal. It’s on of the first things I did in the house and everyone loves the surprise as the go up the stairs. Here is the original post on them: https://blog.effortless-style.com/2009/04/as-promised-stair-update/
What a brilliant idea! I can’t wait to find something to do this to!
This is awesome!! I love your stool. The colors you chose are fantastic!! Where did you get that fuchsia fabric?
I picked it up months ago at http://www.fabric.com. I think it was only $10 a yard, but I don’t see it on their site anymore. Sorry.
genius!!! I love the extra touch you added with the piping!
This turned out so cute!
I love anything with a monogram. This is one of my favorite monogram styes. This monogram is often called Fish Tail if anyone is looking for it. Cute stool idea and I have one at home waiting for me to redo! I now have a great idea! Thanks!
Um that’s gorgeous!! Maybe just maybe I could attempt myself? Nah, I’d screw it up.
I love how that turned out! I am going to have to try that! Love the color choices.
Brilliant, I could think of a dozen or more places where this could be applied-a nursery tops my list!
Looks awesome!
First time commentor! I LOVE LOVE LOVE how it turned out. I am afraid of the sewing machine… so I might just try this! Do you know where I can get a comforter like the one you show here … but at a more affordable price? I am looking for a navy blue.
BTW you are awesome!
That is beautiful! Thank you for sharing!!
I just love this stool! I love the way the monogram turned out. Fantastic idea!
Love everything about this–the font, the fabric, the stool!!! Great job!
Re: Monogram –
You could also do what Jenny at Little Green Notebook did and trace it off your computer screen! Check out her umbrella stand: http://littlegreennotebook.blogspot.com/2009/08/monogrammed-umbrella-stand.html
In order to get the nice sharp lines you need it’s really best to print out your monogram on cardstock and cut it out. It will give you a nicer finish then trying to deal with tracing it off a monitor. That’s just my opinion though.
Such a great tutorial! I’ve been drooling over all of the Leontine monograms for so long…I can’t wait to do my own now. Fabulous post!!
I am loving your stool! Love those colors! It looks like we both share a love for monograms. I did a couple of posts on “DIY” monograms – hope you check it out when you get a chance.
http://justspiffit.com/2011/07/20/monograms-all-by-yourself/ and then this one also http://justspiffit.com/2011/07/20/more-on-monograms/
Also – I really get excited when I see you have posted a new blog!
Thanks for sharing your talents with all of us.
Debra
I just started following your blog and love this project you did, and your blog of course. Soooo cute! 🙂
Hey i just wanted to thank you for this information! I made two pillowcase monograms using the materials and directions you provided. I have two beautifuly monogramed ( and incredibly soft) pillowcases for a total of about 17$. I got everything at walmart, and the bonding paper i bought by the yard, it was only two dollars, as well as some clearance fabric in lavender. 🙂
Hi,
I am working on a similar project for some shams, and I just wanted to ask how the monogram has held up. I, too, was going to enlist my seamstress to stitch the border of the monogram (just for a more secure hold and to look a little more finished) but am afraid to because of the ultra bond instructions. Have the edges warped/come apart from the velvet? Thanks for your time!
Best,
Erin
This is an AWESOME tutorial…i’ve been searching! Thanks so much for sharing 🙂
I LOVE HOW EASY YOU MAKE IT DO THANKS SO MUCH. PAULA MORRIS
Hi Camila,
I adore your stool, the colors and the monogram!Perfect project for me!
xoxo
Karena
Art by Karena
Giveaway from Splendid Sass
I featured your DIY No Sew Monogram at my blog! You can see it here: http://www.rainonatinroof.com/2013/06/10-lilly-pulitzer-inspired-projects.html
Jenna @ Rain on a Tin Roof
can you please make a video??
This is so cute! What setting did you iron on? I just don’t want to ruin my velvet but I want the letters to stick lol!
I’m wanting to monogram an umbrella. Do u know if the fabric will be OK to iron these on?
I think it would work. I would just cover it with some sort of protective finish. Like one of those spraypaint glosses or anti water sprays. I would also make sure I use the iron on the lowest setting so you don’t burn through the umbrella.
I love this idea! I am making matching tie blankets for my sorority little and myself and was wondering if the iron on stays well or if it starts to peel off after a while. Thanks!
It’s still staying on strong!
Hi, I’m wondering how the edges of the yellow fabric doesn’t fray. Is it because of the Heat and Bond Ultra Hold?
I think it has been working because of the heat and bond ultra hold and because the fabric I used was on the stiffer side. It’s still one of my favorite pieces.
Hi! Wondering how the monogram would hold up in the wash? Thinking of doing something on children’s furniture, which will most likely need a few washings in it’s lifetime. Thank you!
Mine is on a stool that is stapled on so, I have never had to wash it and we are still going strong! Not sure how it would do in the wash. I”m sure it would be okay for a couple, but I imagine the edges might start to curl after a lot of washes.